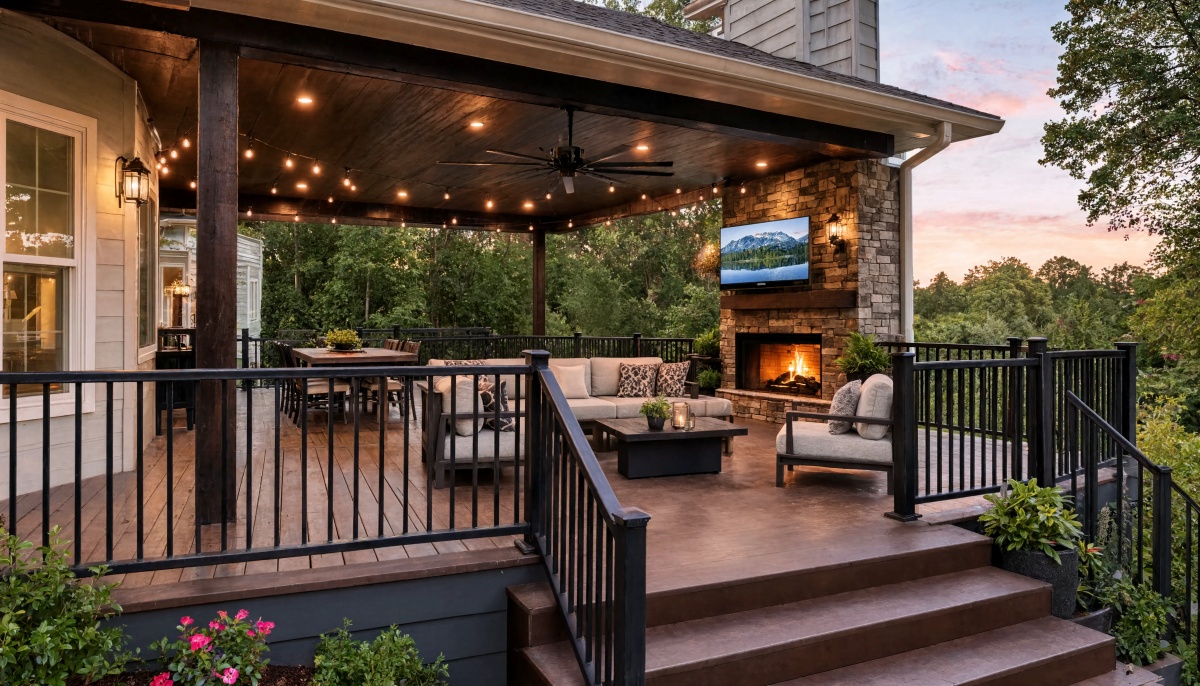
The right covered deck ideas can turn an exposed outdoor platform into a comfortable, practical extension of your home. A well-designed deck cover does more than provide shade. It can help control rain exposure, improve outdoor comfort, protect deck surfaces, create space for lighting and electrical features, and make the deck feel more integrated with the architecture of the house. For homeowners in Washington, where wet weather, seasonal temperature changes, and moisture management deserve careful consideration, the best covered deck designs start with thoughtful planning rather than simply choosing a roof style that looks attractive.
At Evergreen Home Exteriors, we believe exterior remodeling works best when design decisions are supported by clear planning, logical construction sequencing, and attention to how every component interacts. A covered deck should look great from the backyard, but it should also make sense structurally, drain water predictably, and hold up to years of exposure.
Start With the Purpose of Your Covered Deck
Before comparing materials, rooflines, or decorative details, decide how you expect to use the deck. The intended function influences nearly every design decision that follows.
For example, a deck designed primarily for grilling may need ventilation, durable finishes, task lighting, and room for food preparation. A quiet sitting area may benefit more from privacy screening, softer lighting, and protection from wind. A large entertainment space could require electrical outlets, ceiling fans, speakers, and clearly defined circulation paths.
Some common goals include:
Creating a dry outdoor seating area
Adding shade during warmer months
Protecting outdoor furniture from frequent rain
Building an outdoor dining area
Creating a covered grilling or cooking zone
Improving year-round backyard usability
Adding architectural character to the rear of the home
Increasing privacy from neighboring properties
Creating a transition between indoor and outdoor living spaces
Establishing these priorities early prevents a common remodeling problem: designing a beautiful structure first and trying to make it functional afterward.
Match the Roof Design to Your Home
One of the most important covered deck ideas is also one of the simplest: make the new structure look like it belongs to the house.
A deck roof that appears disconnected from the home’s architecture can feel like an addition in the wrong sense of the word. Ideally, roof pitch, trim details, fascia, columns, siding transitions, and other visible elements should coordinate with the existing exterior.
Gable Roof Deck Covers
A gable roof has two sloping roof planes that meet at a ridge. This design can make a covered deck feel taller and more open because the ceiling naturally rises toward the center.
Gable covers work particularly well when homeowners want:
A spacious appearance
Strong architectural definition
Good air circulation
Opportunities for exposed beams or finished ceilings
A roofline that becomes a visual feature
The connection between the new gable and the existing home should be planned carefully. Roof intersections require proper flashing, drainage, structural support, and weatherproofing.
Shed Roof Deck Covers
A shed roof uses a single sloping plane. It is one of the most straightforward ways to cover a deck and can complement both traditional and contemporary homes.
Its relatively simple geometry can make construction and drainage easier to plan, but roof pitch still matters. The roof needs enough slope for the selected roofing material and local conditions.
A shed roof is often a good choice when homeowners want a clean profile without overwhelming the home’s existing architecture.
Hip Roof Deck Covers
A hip roof slopes downward on multiple sides. It can create a polished, integrated appearance and often works well on larger decks.
Because the geometry is more complex than a basic shed roof, structural planning and water management become especially important. The additional roof planes also introduce more framing connections and drainage considerations.
Extended Existing Rooflines
In some projects, the most seamless approach is to continue or visually complement an existing roofline.
When properly planned, this design can make the covered deck appear as though it was part of the original home. However, tying new construction into an existing roofing system requires precise attention to flashing, structural loads, drainage paths, and exterior finishes.
Consider a Partially Covered Deck
A deck does not always need to be completely covered.
A partially covered layout can provide a balance between weather protection and open-air enjoyment. You might place the dining table and seating area beneath the roof while leaving another portion of the deck uncovered for sunshine, container gardening, or a barbecue.
This approach can also create useful activity zones.
For example:
Covered zone: seating and dining
Partially sheltered transition zone: serving area or outdoor kitchen
Open zone: grilling, gardening, or sun exposure
Creating separate zones can make a large deck more functional without requiring the entire structure to be roofed.
Use the Ceiling as a Design Feature
Homeowners naturally focus on what a covered deck looks like from the backyard, but the ceiling is what people sitting beneath the structure will see most often.
That makes the ceiling an important design opportunity.
Possible approaches include wood-look finishes, finished panel systems, painted materials, exposed beams, or clean architectural surfaces.
The best option depends on the home’s style, maintenance expectations, budget, and exposure conditions.
A finished ceiling can also provide an organized location for electrical features such as:
Recessed lighting
Pendant lights
Ceiling fans
Speakers
Outdoor-rated heaters
These systems should be planned before finish materials are installed. Electrical work is much easier to integrate cleanly when wire routing, fixture locations, and framing requirements are established early in the project.
Think Carefully About Columns and Posts
Columns are structural components, but they are also major visual elements.
Large posts can frame outdoor spaces beautifully when their dimensions fit the overall structure. Posts that are too narrow may look visually weak beneath a substantial roof, while overly bulky columns can block views and consume usable deck space.
Column placement should consider both structural requirements and everyday movement.
Ask practical questions during planning:
Will a column interrupt the view from inside the house?
Will posts interfere with furniture placement?
Is there enough space around doors and stairs?
Does the layout create natural walking paths?
Will railing connections look intentional?
Good design often comes down to resolving these small relationships before construction begins.
Incorporate Integrated Lighting
A covered deck creates an excellent opportunity for permanent outdoor lighting.
Instead of relying exclusively on wall-mounted fixtures, homeowners can add ceiling lights that illuminate seating areas more evenly.
Recessed fixtures can create a clean, streamlined look. Decorative fixtures can add character above dining tables or conversation areas. Low-level lighting can also be incorporated near stairs and walking surfaces.
Consider using separate lighting zones when possible. You may want bright task lighting while preparing food but softer lighting when relaxing later in the evening.
Planning switches, fixture locations, wiring routes, and electrical loads early helps avoid visible conduit or awkward fixture placement later.
Add Ceiling Fans for Air Movement
A roof provides shade, but it can also reduce natural air movement depending on the deck’s orientation and surrounding walls.
Ceiling fans can help.
Outdoor-rated fans circulate air around seating and dining areas while adding another layer of comfort during warmer weather.
Before choosing a fan, consider:
Ceiling height
Blade clearance
Outdoor exposure rating
Electrical requirements
Structural mounting location
Position relative to lights
The mounting point needs to be incorporated into the framing so the fixture is adequately supported.
Plan for Washington Rain
For Washington homeowners, water management should be treated as a fundamental engineering consideration rather than an afterthought.
Rain needs somewhere to go.
That means thinking about roof slope, gutters, downspouts, flashing, drainage areas, soil conditions, and how water moves around the foundation and deck supports.
A well-covered deck can reduce direct exposure on the deck surface, but the roof also concentrates rainfall into specific drainage locations. That water must be directed appropriately.
Poorly planned drainage can potentially contribute to:
Splashback
Soil erosion
Standing water
Moisture near structural components
Water accumulation near the home’s foundation
Excessive runoff in landscaping areas
The goal is not simply to keep people beneath the roof dry. The entire water path should make sense from the roof surface to the final drainage location.
Coordinate Decking With the Covered Environment
Covering a deck changes its exposure conditions.
Some areas may stay relatively dry while perimeter sections still experience blowing rain, snow, moisture, and sunlight. This uneven exposure should influence material selection and installation planning.
Composite decking is popular because homeowners often appreciate its lower maintenance requirements. Wood offers natural warmth and character but typically requires more ongoing care.
Regardless of material, deck boards need proper installation spacing and underlying structural support.
A roof does not eliminate the need to think about moisture. Even covered decks remain exterior structures.
Create an Outdoor Dining Room
One of the most useful covered deck ideas is turning part of the structure into a true outdoor dining space.
Start with the size of the table rather than the dimensions of the deck alone.
A table needs additional room for chairs to slide backward and for people to walk behind seated guests. If circulation space is ignored, a dining area that looked spacious on paper can feel surprisingly tight.
You may also want:
A pendant light above the table
Electrical outlets nearby
Easy access to the kitchen
Space for a serving cart
Protection from prevailing rain
Privacy screening on one side
Planning around furniture dimensions creates a more realistic understanding of how the finished deck will function.
Build a Covered Conversation Area
Another option is to treat the covered deck like an outdoor living room.
A sofa, chairs, and central table can create a comfortable place for reading, entertaining, or spending time outside even when the weather is less than perfect.
For this arrangement, pay attention to sightlines.
Ideally, furniture should not block primary doors, stairs, or traffic paths. Columns should frame the seating area rather than interrupt it.
Electrical outlets can also be useful for lamps, devices, or entertainment equipment, provided everything is designed appropriately for exterior use.
Consider Privacy Screens
A deck roof can make an outdoor area feel more enclosed, which creates opportunities to integrate privacy features.
Screens can be particularly helpful when neighboring houses are close together.
Options may include:
Horizontal slat screens
Vertical architectural screens
Partial-height privacy walls
Decorative panels
Integrated planter areas
Strategic railing designs
Avoid enclosing every side simply because privacy is desired. Too much enclosure can reduce airflow and make the deck feel smaller.
A better approach is usually to identify specific sightlines that need screening and address those strategically.
Explore Covered Deck Ideas With Skylights
Some homeowners worry that covering a deck will make adjacent interior rooms darker.
Skylights or translucent roofing elements can sometimes help bring additional daylight beneath the structure.
Placement matters. The goal should be to introduce useful natural light without creating excessive glare or unwanted heat gain.
Any opening or penetration in a roof also introduces additional detailing requirements. Proper flashing and installation are essential for maintaining long-term weather resistance.
Add an Outdoor Kitchen Carefully
Covered outdoor kitchens can be fantastic gathering spaces, but they require more planning than placing a grill beneath a roof.
Cooking appliances create heat, smoke, grease, and ventilation concerns.
Before designing the roof around an outdoor kitchen, consider equipment clearances and manufacturer installation requirements. Gas, plumbing, electrical, and ventilation systems may also need to be coordinated.
A good outdoor kitchen plan considers:
Appliance placement
Counter workspace
Heat clearances
Ventilation
Lighting
Electrical outlets
Storage
Traffic flow
Weather exposure
The key is coordination. Appliances and utilities should influence framing and layout decisions before construction begins.
Consider Built-In Heaters
Outdoor-rated heating systems can extend the seasonal usefulness of a covered deck.
Electric radiant heaters are sometimes installed overhead or along structural elements. Because heaters produce significant heat, they must be positioned according to appropriate clearance requirements and manufacturer instructions.
Planning them early allows electrical circuits, structural attachment points, and ceiling finishes to be coordinated rather than retrofitted later.
Use Railings to Support the Overall Design
Railings can significantly affect the appearance of a covered deck.
Traditional wood-style railings can reinforce a classic exterior. Metal balusters can create contrast. Cable or other visually open systems may help preserve views where appropriate.
Whatever style you choose, railing placement should coordinate with posts, stairs, roof supports, and deck edges.
A polished project typically has strong visual alignment. Roof columns, railing posts, stairs, and architectural lines should feel connected rather than randomly positioned.
Think About How the Deck Connects to the Yard
A covered deck should not function like an isolated platform.
Think about how people will travel from the deck into the yard.
Stair location can significantly influence how naturally the outdoor space works. A poorly located staircase may force people to walk around furniture or create an awkward transition into landscaping.
When planning stairs, consider where people are most likely to go next.
That could include:
A patio
A fire pit
A garden
A lawn
A pathway
A hot tub
A detached garage
A backyard gate
Designing these connections deliberately can make the entire property feel more cohesive.
Don’t Ignore the Space Under an Elevated Deck
If your deck is elevated, the area underneath may present another opportunity.
Depending on site conditions and design, it could potentially become storage, sheltered patio space, or simply a cleaner finished area beneath the deck.
Drainage remains especially important.
Water passing through deck boards should not be allowed to create unmanaged moisture problems underneath. If the lower area is intended for regular use, water-management systems may need to be considered as part of the overall design.
Plan Structure Before Finishes
It is easy to get excited about ceiling materials, furniture, lighting, and color palettes, but those decisions come after the structure.
The covered deck needs a reliable load path.
In simple terms, loads from the roof must transfer through framing members and supports into appropriately designed foundations or structural connections.
Important factors can include:
Roof loads
Wind forces
Existing house framing
Beam spans
Joist spans
Post placement
Footing design
Connection hardware
Local building requirements
This is one reason planning-first construction is so valuable. Structural decisions made early provide a logical framework for everything that follows.
Sequence the Project Carefully
Construction sequencing can have a major impact on both efficiency and finish quality.
For example, roofing, electrical work, ceiling installation, siding transitions, flashing, painting, and decking may need to happen in a specific order.
When sequencing is unclear, trades may have to undo or work around finished components.
A well-organized remodeling process asks:
What needs to be installed first?
Which systems need access before surfaces are closed?
Where will roofing and siding transitions occur?
When should electrical rough-in happen?
Which finish materials need protection during later work?
Clear sequencing reduces unnecessary rework and helps improve the quality of the completed project.
Choose Details That Look Good Up Close
Large design elements create the first impression, but craftsmanship becomes most visible in the details.
Look closely at:
Trim transitions
Fastener placement
Beam connections
Post bases
Ceiling edges
Flashing
Railing connections
Lighting alignment
Siding interfaces
These areas reveal whether the project was treated as a complete system or simply assembled one component at a time.
The strongest covered deck designs balance appearance, durability, and buildability.
Frequently Asked Questions About Covered Decks
What is the best roof style for a covered deck?
There is no single best roof style. Gable, shed, hip, and integrated roof designs can all work well. The right option depends on your home’s architecture, available attachment points, deck size, drainage requirements, structural conditions, and desired appearance.
Is a covered deck useful in Washington?
Yes. A roof can make an outdoor deck significantly more usable during rainy weather while also providing shade and some protection for furniture and deck surfaces. Proper drainage and moisture management are especially important in Washington’s climate.
Should a covered deck match the house?
Ideally, yes. Coordinating roof pitch, trim, columns, siding, roofing materials, and architectural proportions can make the addition feel more intentional and integrated.
Can I add lighting to a covered deck?
Yes. Covered decks can accommodate outdoor-rated recessed lights, decorative fixtures, fans, and other electrical features. These components are easiest to install cleanly when electrical planning happens before ceiling finishes are completed.
Can a covered deck include an outdoor kitchen?
It can, but cooking areas require careful planning for appliance clearances, heat, smoke, ventilation, utilities, and combustible materials. Equipment specifications should be reviewed before the structure is designed around the kitchen.
Will covering my deck make my house darker?
It can reduce some natural light entering nearby windows or doors. Roof height, roof depth, orientation, ceiling color, skylights, and other design decisions can help manage the effect.
Should the entire deck be covered?
Not necessarily. Partial coverage can provide sheltered dining and seating while preserving an open area for sunlight, grilling, gardening, or other activities.
What should I plan before building a covered deck?
Start with how you want to use the space. Then consider roof design, structure, drainage, deck materials, stairs, lighting, electrical needs, furniture layout, privacy, ventilation, and connections to the rest of the property.
Why is drainage important for a covered deck?
A roof collects water and directs it toward specific edges. Gutters, downspouts, grading, and drainage paths need to manage that concentrated runoff without creating standing water, erosion, or unnecessary moisture near the structure.
How can I make a covered deck feel like an outdoor room?
Use coordinated lighting, comfortable furniture, defined activity zones, finished ceilings, architectural columns, fans, privacy features, and thoughtful transitions between the deck and the home’s interior.
Bring Your Covered Deck Ideas to Life With Evergreen Home Exteriors
A covered deck should be more than a roof over an outdoor platform. It should be a carefully planned part of your home that manages weather effectively, supports the way you want to use your backyard, and looks intentional from every angle.
Evergreen Home Exteriors is a Washington remodeling contractor focused on planning-first project delivery. We emphasize clear project scope, clean construction sequencing, and craftsmanship that looks great up close while performing reliably over the long term. From rooflines and drainage to structural details and finish work, thoughtful coordination helps produce outdoor spaces that are both attractive and technically sound.
If you are considering a new covered deck or exploring ways to improve your home’s exterior living space, Evergreen Home Exteriors can help you develop a plan that fits your property, priorities, and long-term goals. Schedule your FREE, no-pressure consultation with us today and start planning a covered deck designed to look great, function intelligently, and stand up to Washington conditions.
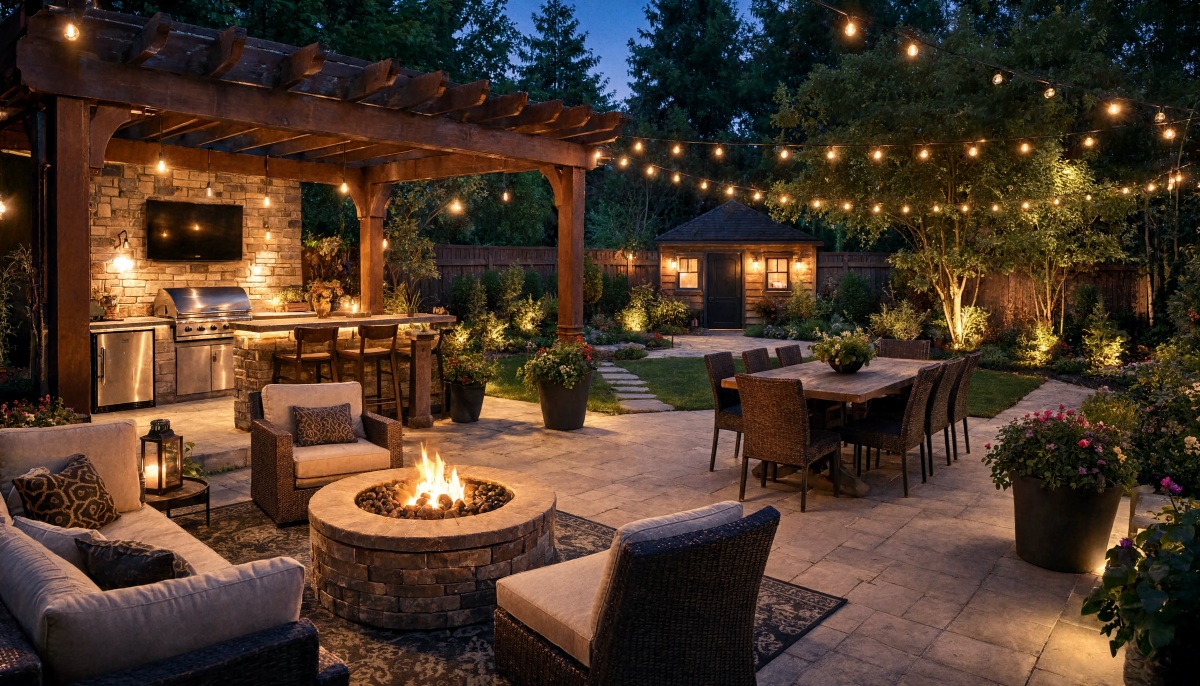
The best backyard patio ideas combine attractive design with practical engineering. A patio should feel like a natural extension of your home, but it also needs to handle weather, drainage, foot traffic, furniture loads, seasonal temperature changes, and years of regular use.
In Washington, those technical considerations become especially important because moisture can quickly expose weaknesses in materials, grading, installation, and waterproofing.
With thoughtful planning, however, your patio can become a comfortable outdoor living area that looks polished while continuing to perform well year after year.
At Evergreen Home Exteriors, we believe successful remodeling starts before construction begins.
Clearly defining the scope, evaluating existing conditions, selecting appropriate materials, and establishing the correct construction sequence can prevent many of the problems homeowners encounter with outdoor projects.
Whether you are considering a simple seating area or a complete backyard transformation, the following ideas can help you design a patio that balances appearance, comfort, durability, and long-term performance.
1. Start With the Patio’s Purpose
Before selecting pavers, furniture, colors, or decorative elements, determine exactly how you want to use the patio.
This decision influences nearly every technical aspect of the project, including the size, shape, traffic patterns, lighting, electrical requirements, and relationship to the house.
Consider whether the patio will primarily be used for:
Outdoor dining
Family gatherings
Entertaining guests
Grilling and cooking
Relaxing around a fire feature
Gardening and container plants
Children’s activities
Hot tub placement
Quiet reading or conversation
A combination of several functions
A patio designed for two chairs and a small table requires significantly less space than one designed to accommodate an eight-person dining table, grill station, lounge furniture, and outdoor fireplace.
Think about circulation as well.
People should be able to move between the house, patio, yard, and other outdoor areas without squeezing around furniture or walking directly through a conversation area.
Planning these details first makes it easier to develop a patio that works structurally and functionally instead of simply fitting into whatever space happens to be available.
2. Create Clearly Defined Outdoor Zones
Larger patios often work best when divided into functional zones.
Rather than creating one oversized open surface, you can establish distinct areas for dining, cooking, relaxing, and entertaining.
For example, one section might include a dining table positioned close to the kitchen door.
Another area could contain comfortable seating surrounding a fire pit.
A third space could hold a grill or outdoor kitchen.
Zones can be visually defined with:
Changes in paving patterns
Outdoor rugs
Pergolas
Planters
Seat walls
Lighting
Furniture arrangements
Changes in elevation
These subtle boundaries help organize the patio without enclosing it.
From an engineering perspective, zoning also allows homeowners to anticipate where utilities, foot traffic, concentrated loads, and heat-producing equipment will be located.
Those considerations can influence everything from electrical planning to substrate preparation.
3. Consider a Paver Patio
Concrete pavers are a popular patio option because they offer considerable design flexibility.
They are available in numerous shapes, textures, patterns, and sizes, making it possible to create everything from a traditional patio to a contemporary geometric layout.
Proper installation is essential.
A high-performing paver patio depends heavily on what is underneath the finished surface.
Excavation depth, compacted base material, bedding material, drainage, edge restraint, and joint stabilization all contribute to long-term performance.
A patio may look beautiful immediately after installation, but insufficient base preparation can eventually lead to settlement, uneven surfaces, shifting pavers, and drainage problems.
When designing a paver patio, think about the complete assembly instead of concentrating exclusively on the visible material.
4. Use Concrete for a Clean, Practical Design
Concrete remains one of the most versatile patio materials available.
It works particularly well for homeowners who prefer simple, clean lines.
Modern concrete patios do not necessarily have to resemble a plain gray slab.
Options can include:
Broom finishes
Decorative scoring
Exposed aggregate
Stamped patterns
Integrated borders
Contrasting sections
Large-format geometric layouts
Joint placement deserves careful consideration.
Concrete naturally expands and contracts, and properly located joints can help manage cracking.
Water management is equally important.
The slab should be designed with sufficient slope to direct water toward an appropriate drainage location rather than allowing it to collect near the home.
5. Incorporate Covered Patio Space
Washington weather makes covered outdoor living especially attractive.
A roofed patio can provide protection from rain while extending the number of months you can comfortably use your backyard.
A patio cover can range from a simple roof extension to a substantial outdoor structure integrated into the architecture of the home.
Possible options include:
Solid patio roofs
Pergolas
Louvered systems
Partial shade structures
Covered outdoor kitchens
Roof extensions
The connection between a patio cover and the existing house should be planned carefully.
Structural loads, flashing, water management, roof drainage, and attachment methods all need to be addressed correctly.
A beautiful patio cover is only successful if water moves away from the structure as intended.
6. Build Around an Outdoor Kitchen
For homeowners who regularly entertain, an outdoor kitchen can transform a basic patio into a functional gathering space.
Outdoor kitchens can include:
Built-in grills
Countertops
Refrigerators
Sinks
Storage cabinets
Pizza ovens
Beverage centers
Bar seating
Planning should begin with utilities.
Gas, electrical, plumbing, ventilation, and drainage requirements may affect the layout significantly.
It is also important to think about workflow.
A well-designed outdoor kitchen should provide convenient areas for food preparation, cooking, serving, and cleanup without creating unnecessary congestion.
Whenever possible, position the outdoor kitchen close enough to the home’s interior kitchen that carrying supplies between the two spaces remains convenient.
7. Add a Built-In Fire Feature
Fire pits and outdoor fireplaces create natural gathering points and can make a patio comfortable during cooler evenings.
A fire feature should have adequate clearance from the home, fences, landscaping, furniture, patio covers, and combustible materials.
Local requirements and manufacturer specifications should always be considered.
Built-in fire pits can be incorporated directly into a patio design, creating a more permanent appearance than portable units.
Consider arranging seating so guests can enjoy the fire without blocking major walkways.
Built-in seat walls can be particularly effective because they provide both architectural definition and additional seating.
8. Design for Proper Drainage
Drainage may not be the most visually exciting patio feature, but it is one of the most important.
Water should move away from the foundation rather than toward it.
Standing water can also create slippery surfaces, accelerate material deterioration, and contribute to settlement problems.
A patio design might use:
Surface slope
Channel drains
Catch basins
Permeable paving
Strategic downspout routing
French drains
Landscape drainage systems
The appropriate solution depends on the site’s elevation, soil conditions, roof drainage, surrounding landscaping, and existing water movement.
Washington homeowners should pay particular attention to drainage because repeated moisture exposure can magnify small construction deficiencies.
9. Blend the Patio With the Architecture of the Home
A patio should not feel like an unrelated platform dropped into the backyard.
Materials, proportions, shapes, and colors should complement the house.
For a contemporary home, large-format pavers, straight edges, and simplified landscaping may work well.
A traditional home might pair naturally with brick-inspired pavers, natural stone, or softer curved edges.
Look at existing architectural details such as:
Exterior siding
Trim colors
Roofing
Masonry
Decking
Window styles
Door finishes
Existing hardscaping
You do not necessarily need to match materials exactly.
Coordinating colors, textures, and proportions is often enough to create visual continuity.
10. Combine a Patio With a Deck
Some backyards benefit from having both a deck and a patio.
For example, an elevated deck might connect directly to a second-story living area while stairs lead to a ground-level patio.
The patio can then provide additional space for dining, grilling, or gathering.
This approach is especially useful on sloped properties because the combination can help transition between different elevations.
The connection between the structures should be planned intentionally.
Stair placement, drainage, foundation requirements, railing systems, lighting, and circulation should all work together.
11. Add Built-In Seating
Built-in seating can make efficient use of patio space while reducing the amount of movable furniture needed.
Low masonry or concrete walls can serve multiple functions by:
Providing seating
Defining patio boundaries
Creating retaining walls
Supporting planters
Separating activity zones
Built-in benches can also be integrated into wood or composite structures.
Pay attention to seating dimensions and ergonomics.
A wall that technically functions as seating may not be comfortable if the height or depth is poorly proportioned.
12. Incorporate Outdoor Lighting
A well-designed patio should remain functional after sunset.
Lighting can improve safety while creating a comfortable atmosphere.
Instead of relying entirely on one bright fixture attached to the house, consider layering several types of outdoor lighting.
Options can include:
Step lights
Path lights
Wall-mounted fixtures
Under-counter lighting
Pergola lighting
Landscape lights
String lighting
Recessed patio-cover lights
Low-voltage accent lighting
Electrical planning should happen early in the project.
Installing conduit or wiring before the patio surface is completed is typically much easier than modifying finished hardscape later.
13. Create a Connection Between Indoor and Outdoor Spaces
One of the most effective patio design strategies is improving the transition between the home’s interior and exterior.
Large patio doors can make an outdoor living space feel visually connected to the kitchen, dining room, or living room.
When remodeling allows it, homeowners may consider:
Sliding glass doors
French doors
Multi-panel doors
Wider openings
Larger windows overlooking the patio
Thresholds, flashing, water drainage, and structural requirements should be addressed carefully whenever exterior openings are modified.
The goal is to create an inviting transition without compromising the building envelope.
14. Include Privacy Without Completely Closing the Space
Even beautiful patios can be uncomfortable if neighboring properties overlook the seating area.
Privacy can be created using landscaping and architectural features rather than constructing solid barriers around the entire patio.
Consider:
Privacy screens
Trellises
Tall ornamental grasses
Evergreen shrubs
Trees
Pergola curtains
Decorative panels
Strategic seat walls
Position privacy features where they are actually needed.
In many yards, blocking one or two specific sightlines provides enough separation while preserving openness.
15. Add Landscaping Around the Patio
Hardscaping generally looks more natural when softened by landscaping.
Planting beds around portions of the patio can help integrate the surface with the rest of the backyard.
Container plants also provide flexibility for homeowners who enjoy changing colors and arrangements throughout the year.
Think about mature plant size when planning landscaping.
Small shrubs placed immediately next to a patio may eventually grow into walkways or seating areas.
Drainage should also be considered.
Irrigation water and soil runoff should not constantly wash across the patio.
16. Consider Permeable Patio Materials
Permeable paving systems allow water to move through spaces in the pavement rather than running entirely across the surface.
Depending on site conditions, these systems can help manage stormwater and reduce surface runoff.
However, permeable patios still require carefully engineered base preparation.
The underlying layers must provide both structural support and appropriate water movement.
They should not be treated simply as standard pavers with wider joints.
17. Plan for Future Features
You may not want an outdoor kitchen, pergola, hot tub, or lighting system immediately, but it can still be smart to plan for future upgrades.
During patio construction, homeowners may choose to install conduit, utility sleeves, reinforced areas, or other infrastructure that makes future projects easier.
Thinking ahead can reduce the need to remove or cut into finished patio surfaces later.
A planning-first approach asks not only what you want from the patio today, but also how the space might evolve over the next five, ten, or fifteen years.
18. Make Material Durability a Priority
Outdoor materials face continuous exposure to sunlight, rain, temperature changes, dirt, vegetation, and normal wear.
When comparing backyard patio ideas, look beyond appearance.
Ask how each material performs under real conditions.
Consider:
Water resistance
Freeze-thaw performance
Slip resistance
Maintenance requirements
Stain resistance
UV exposure
Expected service life
Repairability
Compatibility with surrounding materials
The lowest upfront price does not always result in the lowest long-term cost.
Durable materials combined with proper installation generally offer better value than decorative materials installed over an inadequate base or poorly detailed drainage system.
19. Keep Maintenance in Mind
Every patio requires some maintenance, but the amount varies considerably depending on the design and materials.
Before making final selections, determine whether you are comfortable with periodic sealing, joint maintenance, cleaning, staining, or vegetation control.
If low maintenance is a priority, choose materials and landscaping accordingly.
Simple designs with accessible drainage systems and durable finishes are often easier to maintain than extremely complex layouts with numerous transitions and decorative joints.
20. Get the Construction Sequence Right
A patio project may involve excavation, utilities, foundations, drainage, hardscaping, electrical work, landscaping, lighting, and structural construction.
The order of operations matters.
For example, underground utilities should generally be addressed before the finished patio surface is installed.
Drainage should be resolved before landscaping is completed.
Structural supports for patio covers need to coordinate with the patio layout.
Clear sequencing reduces unnecessary rework and helps keep the project organized.
This is where planning-first remodeling delivers real value.
Good construction is not just about the quality of each individual task. It is also about making sure every stage prepares correctly for the one that follows.
Frequently Asked Questions About Backyard Patios
What is a good size for a backyard patio?
The ideal size depends on how you plan to use it.
A small conversation area may require relatively little space, while a patio designed for dining, cooking, and entertaining will need significantly more room.
Plan around furniture dimensions and walking space rather than choosing an arbitrary square footage.
What is the most important part of patio construction?
The foundation and drainage are among the most important components.
Proper excavation, compaction, base preparation, grading, and water management help protect the finished patio from settlement and premature deterioration.
Should a patio slope away from the house?
Generally, outdoor surfaces should be designed so water moves away from the home’s foundation.
The exact drainage approach depends on site conditions, patio materials, surrounding elevations, and applicable construction requirements.
Is a covered patio worth considering in Washington?
For many Washington homeowners, yes.
A covered patio can provide protection from frequent rain and extend the amount of time an outdoor living area remains comfortable and usable.
Can I add an outdoor kitchen later?
Yes, but future installation is easier if utilities and structural requirements are considered during the original patio design.
Installing conduit or utility pathways before hardscaping is finished may reduce future demolition.
Are pavers better than concrete?
Neither option is universally better.
Pavers offer considerable design flexibility and can allow individual units to be replaced.
Concrete provides a clean, continuous surface and can be finished in numerous ways.
Proper installation matters with either option.
How can I make a small backyard patio feel larger?
Use appropriately scaled furniture, simple paving patterns, integrated seating, strategic lighting, and clearly defined circulation paths.
Avoid overcrowding the space with oversized furniture or too many competing features.
Do I need professional help designing a patio?
Professional planning can be particularly valuable when a patio involves grading, drainage, structural components, exterior remodeling, utilities, or connections to the home’s building envelope.
Addressing these conditions early can prevent expensive corrections later.
What should I consider before adding a fire pit?
Evaluate clearance from combustible materials, seating placement, ventilation, fuel supply, manufacturer requirements, and applicable local regulations.
Fire features should be incorporated into the patio layout rather than treated as an afterthought.
How long should a properly built patio last?
Service life depends on the materials, environmental exposure, installation quality, drainage, base preparation, and maintenance.
A well-designed patio built with appropriate materials and sound construction practices can provide many years of dependable use.
Build Your Patio With Evergreen Home Exteriors
Great patios begin with good planning.
Attractive materials and creative layouts matter, but lasting results depend on the details beneath and around the finished surface, including drainage, structural preparation, material compatibility, sequencing, and careful craftsmanship.
At Evergreen Home Exteriors, we’re a Washington remodeling contractor focused on planning-first project delivery.
That means establishing a clear scope, organizing clean construction sequencing, and delivering craftsmanship that looks great up close while continuing to perform over the long term.
Whether your project involves a new outdoor living area or a broader exterior transformation, we can help you approach the work with a practical plan built around your home and your goals.
Ready to explore the right backyard patio design for your property?
Schedule your FREE, no-pressure consultation with us today and start planning an outdoor space designed for lasting enjoyment.
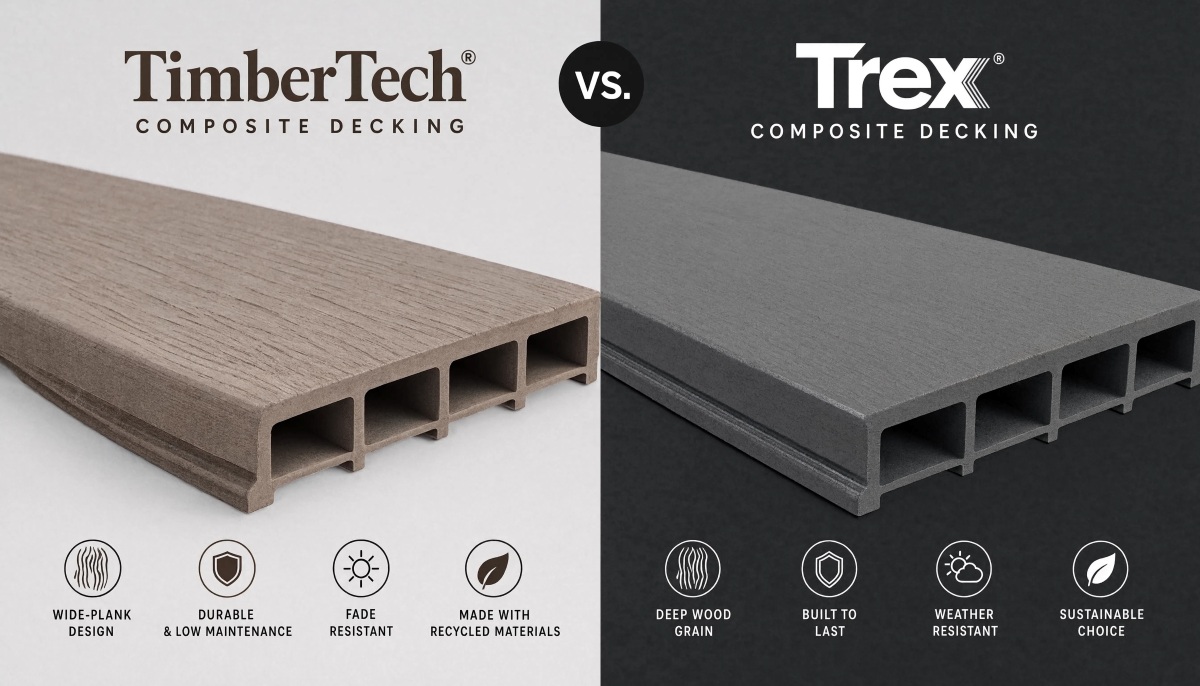
When homeowners start comparing composite decking options, TimberTech vs. Trex is often one of the first matchups they investigate. Both brands are well established in the decking industry; both provide alternatives to traditional wood, and both offer product lines designed to reduce routine maintenance. Still, choosing between them should involve more than comparing colors or looking at a few sample boards. The best decking system for your home depends on material construction, moisture resistance, surface performance, structural planning, installation details, maintenance expectations, and the overall design of your outdoor space.
For homeowners in Washington, those technical considerations become especially important. A deck regularly experiences rain, moisture, temperature changes, organic debris, and seasonal weather conditions. Selecting a quality decking product matters, but the way the entire deck is planned and assembled matters just as much.
At Evergreen Home Exteriors, we take a planning-first approach to remodeling projects. That means looking closely at materials, layout, sequencing, structural requirements, drainage, fastening systems, and finishing details before construction begins. If you are comparing TimberTech and Trex, understanding how the two systems differ can help you make a more informed long-term investment.
What Are TimberTech and Trex Decking?
TimberTech and Trex both manufacture low-maintenance decking products designed to recreate the appearance of wood without requiring the same routine staining, sealing, and refinishing associated with traditional lumber.
Although homeowners frequently refer to both brands simply as composite decking, their product catalogs can include boards with different material formulations and construction methods.
Broadly speaking, modern manufactured decking may use:
Wood fibers blended with polymers
Recycled plastic materials
Protective polymer caps
PVC-based construction
Engineered surface textures
Moisture-resistant cores
The specific product line you select matters. Comparing only the brand names can hide meaningful differences between individual collections.
A premium TimberTech board, for example, may perform differently from an entry-level TimberTech board. The same principle applies to Trex.
Instead of asking only, “Which brand is better?” homeowners should also ask, “Which specific product is best suited to my deck design, environment, budget, and performance expectations?”
TimberTech vs. Trex: Material Construction
One of the most important engineering considerations in the TimberTech vs. Trex comparison is board construction.
TimberTech
TimberTech offers multiple categories of manufactured decking, including composite and PVC-based options. That range can be useful when homeowners have specific performance goals.
Depending on the collection, TimberTech decking may feature engineered cores surrounded by protective surface materials. PVC options contain no wood fibers, which can be an attractive characteristic in applications where moisture exposure is a major concern.
Trex
Trex is widely associated with wood-plastic composite decking. Its boards combine recycled wood fibers and plastic materials into an engineered decking product.
Trex boards are generally capped with a protective exterior layer designed to improve resistance to stains, moisture, fading, and everyday wear.
Why Construction Matters
Board composition influences several characteristics, including:
Moisture response
Weight
Heat retention
Expansion and contraction
Scratch resistance
Fastening requirements
Span requirements
Long-term appearance
These differences are one reason professional planning is important. Deck framing, joist spacing, fastening methods, ventilation, and drainage should be compatible with the selected product rather than treated as interchangeable details.
Appearance and Wood-Look Realism
For many homeowners, appearance is one of the biggest deciding factors.
Both manufacturers offer boards designed to resemble natural hardwood, including products with varied grain patterns and multi-tonal coloration.
TimberTech frequently appeals to homeowners interested in sophisticated wood-like textures and premium visual detailing. Depending on the collection, boards may feature pronounced color variation intended to mimic the character of real wood.
Trex also provides a broad range of colors and wood-inspired finishes, from traditional brown tones to contemporary gray and earth-toned selections.
The better option ultimately comes down to the architecture of your home and your personal design goals.
Consider comparing samples next to:
Exterior siding
Trim
Roofing
Doors
Outdoor furniture
Railings
Landscaping materials
Stone or masonry features
A decking color that looks attractive in a showroom can appear different outdoors. Sunlight, cloud cover, moisture, shadows, and surrounding materials can significantly influence how the finished deck looks.
For that reason, evaluating full-size or representative samples at your home can be more useful than relying exclusively on photographs.
Moisture Resistance
Moisture management is an especially important consideration for Washington homes.
Both TimberTech and Trex manufacture decking designed to resist many of the moisture-related problems associated with conventional wood. Manufactured decking does not require the same periodic sealing schedule as natural wood, and properly selected products can provide excellent durability in wet climates.
However, decking boards are only one component of a moisture-conscious deck.
A well-planned deck should also account for:
Proper board spacing
Drainage
Air circulation
Flashing
Ledger installation
Water movement around the structure
Properly protected framing
Connection points
Fastener compatibility
Even high-quality decking cannot compensate for poor structural detailing underneath.
This is why choosing a contractor based solely on installation price can create problems. The visible boards are important, but much of a deck’s long-term performance depends on details homeowners never see after construction is complete.
Maintenance Requirements
One major reason homeowners choose TimberTech or Trex is lower maintenance.
Traditional wood decks generally require periodic cleaning, staining, sealing, and refinishing to preserve their appearance and protect the lumber.
Manufactured decking eliminates much of that work.
Routine care typically focuses on cleaning the surface and removing debris rather than applying protective coatings every few years.
That can be especially valuable for homeowners who want to spend more time using their outdoor space and less time maintaining it.
Common maintenance tasks may include:
Sweeping leaves and debris
Washing dirt from the surface
Cleaning spills promptly
Keeping spaces between boards clear
Removing organic buildup
Following the manufacturer’s cleaning recommendations
Neither system should be considered completely maintenance-free. Every outdoor surface needs some care.
Chairs move across them. Dogs run over them. Grills are repositioned. Planters get dragged. Tools occasionally fall. Foot traffic concentrates around doors and stairs.
Scratch resistance therefore matters.
Both TimberTech and Trex manufacture products with protective surface layers designed for everyday residential use. However, scratch performance varies depending on the exact product collection and surface finish.
Homeowners with large dogs, heavy patio furniture, or high-traffic outdoor entertaining areas should discuss surface durability during product selection.
It is also smart to avoid dragging heavy furniture directly across any manufactured deck.
Furniture pads and careful handling can help preserve the finish regardless of brand.
Heat and Sun Exposure
All decking surfaces can become warm in direct sunlight.
The amount of heat a deck absorbs depends on multiple variables, including:
Board color
Material composition
Sun exposure
Air temperature
Deck orientation
Shading
Local microclimate
Darker boards generally absorb more solar energy than lighter colors.
For a deck with extensive afternoon sun exposure, color selection becomes more than an aesthetic decision. It can influence comfort.
If barefoot use is important, compare physical samples under actual outdoor conditions whenever possible.
Deck orientation can also influence material selection. A shaded north-facing deck may behave differently from an exposed southwest-facing deck receiving intense afternoon sun.
Expansion, Contraction, and Installation Tolerances
Engineered decking expands and contracts as environmental conditions change.
The amount of movement depends on the material and product design.
This is where installation specifications become particularly important.
Correct installation may require carefully controlled:
Board spacing
End gaps
Fastener placement
Joist spacing
Stair framing
Blocking
Edge support
Installers should follow the specifications for the exact decking line being used.
A deck is not simply a collection of boards screwed to framing. It is an interconnected system in which dimensions, fasteners, loads, moisture, and thermal movement need to work together.
Small installation errors can become visible over time.
Good planning minimizes those risks before the first board is installed.
Fastening Systems and Finished Appearance
Both TimberTech and Trex decking can often be installed using fastening systems designed to minimize visible screws across the deck surface.
Hidden fastening systems create a cleaner, more refined appearance and can provide consistent board spacing when installed properly.
There may still be areas where face fastening or specialized fasteners are required, such as:
Stair treads
Perimeter boards
Picture-frame borders
Certain angled sections
Tight transitions
Manufacturer-specified locations
Fastener selection should never be improvised.
Using compatible hardware helps protect the decking and contributes to long-term structural reliability.
Deck Framing Matters More Than Many Homeowners Realize
Homeowners understandably spend significant time choosing decking colors and railing styles, but the framing underneath deserves equal attention.
A beautiful deck built over poorly planned framing is still a poorly planned deck.
Important structural considerations can include:
Joist spacing
Beam placement
Post locations
Footings
Ledger connections
Lateral loads
Stair construction
Blocking
Drainage
Ventilation
Hardware
Manufactured decking can also require different framing tolerances than traditional dimensional lumber.
For example, certain layouts, diagonal installations, or specialty patterns may require closer joist spacing or additional blocking.
This is why the deck design should be finalized before materials are ordered.
Railings and Design Integration
A new deck should look like an intentional extension of the home rather than a platform added afterward.
Both TimberTech and Trex offer decking systems that can be coordinated with railing components and complementary outdoor products.
However, homeowners are not necessarily limited to using every component from the same manufacturer.
A thoughtfully designed deck may combine compatible materials to achieve a particular architectural look.
Consider:
Railing height
Post spacing
Sightlines
Stair transitions
Deck borders
Lighting
Fascia
Skirting
Privacy features
Seating areas
The important factor is compatibility.
Connections, fastening systems, loads, and manufacturer requirements should be reviewed before combining components.
Cost: Is TimberTech or Trex More Affordable?
There is no universal answer because both manufacturers offer multiple product tiers.
Deck cost depends on significantly more than the price per board.
A complete estimate may involve:
Decking
Framing
Footings
Railings
Stairs
Fascia
Fasteners
Hardware
Demolition
Disposal
Permits
Labor
Site access
Design complexity
A simple rectangular deck installed close to grade will typically require less labor than a multilevel deck with stairs, custom borders, complex railings, and difficult access.
Premium decking can also increase material costs significantly compared with entry-level products.
Instead of evaluating only the board price, compare total installed project cost and expected long-term performance.
Warranty Considerations
Warranty coverage is another important comparison point.
TimberTech and Trex offer warranty protection on various product lines, but coverage can differ according to collection, application, installation method, and specific warranty terms.
Before purchasing, homeowners should review:
Product warranty length
Fade protection
Stain protection
Residential versus commercial coverage
Installation requirements
Transferability
Exclusions
Required maintenance
Claim procedures
Do not assume every product sold under one brand carries identical warranty protection.
The warranty associated with the exact collection you are purchasing is what matters.
Professional installation can also help reduce the likelihood of avoidable issues caused by incorrect spacing, fastening, or structural preparation.
TimberTech vs. Trex for Washington Homes
Washington’s climate makes moisture management especially important.
Rainfall, wet leaves, shaded areas, seasonal debris, and long periods of damp weather can challenge outdoor structures.
Both brands can be strong options when the selected product is appropriate for the application, and the deck is built correctly.
For Washington homeowners, we recommend paying particularly close attention to:
Drainage around and beneath the deck
Ventilation
Flashing details
Ledger protection
Framing condition
Fastener corrosion resistance
Organic debris accumulation
Shaded areas that dry slowly
Deck longevity is ultimately a systems problem.
Selecting a premium surface material is helpful, but a durable deck requires every layer of the assembly to function correctly.
Which Brand Has More Design Flexibility?
Both manufacturers provide enough design options for most residential deck projects.
The deciding factor may come down to the particular aesthetic you want.
TimberTech may appeal to homeowners prioritizing premium wood-inspired visuals or certain PVC decking options.
Trex may appeal to homeowners looking for familiar composite construction with numerous established product collections.
Instead of choosing a brand first, start with your performance requirements.
Ask yourself:
How much direct sunlight does the deck receive?
How much moisture exposure is expected?
Do we have pets?
Will furniture move frequently?
What color works with the house?
Do we want wide stairs?
Will the deck include multiple levels?
Do we want picture-frame borders?
What railing style fits the architecture?
How much maintenance are we willing to perform?
Once those requirements are clear, comparing products becomes considerably easier.
Sustainability and Material Efficiency
Homeowners increasingly consider environmental impact when selecting remodeling materials.
Manufactured decking can incorporate recycled content and may reduce the need for staining and refinishing products over the deck’s service life.
Long-term durability is also relevant to sustainability.
A product that performs reliably for decades can reduce the frequency with which materials need to be removed and replaced.
However, sustainability should be evaluated alongside practical engineering considerations.
A material that is theoretically durable will only realize that potential if it is installed properly.
Proper structural design, ventilation, drainage, fastening, and maintenance can contribute substantially to maximizing the useful life of the deck.
Common Mistakes When Choosing Composite Decking
The TimberTech vs. Trex decision can become unnecessarily complicated when homeowners focus on the wrong factors.
Choosing Based Only on Color
Color matters, but performance requirements should come first.
Comparing Brands Instead of Product Lines
Both manufacturers have different collections. Compare equivalent products rather than treating every board from a brand as identical.
Ignoring Framing Requirements
The decking surface cannot compensate for poorly designed framing.
Selecting the Lowest Bid Automatically
Two deck estimates may include very different scopes, materials, structural details, or installation methods.
Forgetting About Railings and Stairs
These components can have a significant impact on design, safety, budget, and construction complexity.
Overlooking Water Management
In wet climates, drainage and flashing deserve serious attention.
How to Evaluate Decking Samples
Physical samples can make your decision easier.
When reviewing TimberTech and Trex samples, do more than compare them under indoor lighting.
Take them outdoors.
Look at them during different times of day and next to your home’s exterior.
Pay attention to:
Grain pattern
Color variation
Surface texture
Sheen
Heat
Visual compatibility
Edge appearance
You may find that a color you loved online looks dramatically different next to your siding.
Conversely, a color you initially overlooked may fit perfectly once you see it in context.
Think About the Entire Deck System
The best deck projects start with the complete system rather than the surface material alone.
A successful project requires coordination between design, engineering, materials, and construction sequencing.
That may include planning the relationship between:
Footings
Posts
Beams
Joists
Decking
Railings
Stairs
Flashing
Fascia
Drainage
Lighting
When each component is considered early, installation becomes more predictable, and the finished deck looks more intentional.
This planning-first philosophy is particularly valuable on remodeling projects, where the existing home can introduce conditions that are not present in new construction.
TimberTech vs. Trex: Which Should You Choose?
There is no single winner for every homeowner.
Both TimberTech and Trex manufacture highly capable decking products. The better choice depends on the particular collection, your project conditions, aesthetic priorities, budget, and long-term expectations.
TimberTech may deserve closer consideration if you are particularly interested in its premium aesthetic options or PVC decking products.
Trex may be attractive if you want a widely recognized composite decking system with numerous colors and product tiers.
For many homeowners, the best way to decide is to compare equivalent product lines side by side and then evaluate how each option fits the engineering requirements of the deck.
The contractor should also consider how the selected product affects framing, fasteners, stairs, borders, transitions, and sequencing.
That is where a planning-first process becomes valuable.
Frequently Asked Questions
Is TimberTech better than Trex?
Neither brand is universally better. Both offer multiple product lines with different construction, appearance, pricing, and performance characteristics. The best choice depends on your specific project.
Is TimberTech more expensive than Trex?
It can be, depending on which collections you compare. Both manufacturers have multiple price tiers, so total project cost should be evaluated using comparable products and installation scopes.
Which decking is better for rainy climates?
Both manufacturers offer products suitable for wet environments. Proper flashing, drainage, ventilation, framing, and installation remain critical regardless of which decking brand you choose.
Does composite decking need to be sealed?
Manufactured composite and PVC decking generally does not require the routine staining and sealing associated with traditional wood decking. Follow the maintenance instructions provided for your specific product.
Does composite decking get hot?
Yes. Any decking material can become warm in direct sunlight. Darker colors generally absorb more heat, so homeowners concerned about surface temperature should compare samples in actual sunlight.
Can TimberTech or Trex be installed over an existing deck frame?
Sometimes. The existing framing must first be evaluated for condition, spacing, structural adequacy, levelness, moisture damage, and compatibility with the new decking system.
How long does composite decking last?
Service life depends on the product, environment, installation quality, structural conditions, and maintenance. Selecting a high-quality board is only one part of creating a long-lasting deck.
Which brand looks more like real wood?
Both TimberTech and Trex offer realistic wood-inspired options. Appearance is subjective, so comparing physical samples is usually the best approach.
Are hidden fasteners better than visible screws?
Hidden fasteners can provide a cleaner appearance and consistent spacing when used in approved applications. However, some deck details may still require face fasteners or specialized hardware.
Should I replace the framing when installing new composite decking?
Not automatically. Existing framing should be inspected carefully. Damaged, undersized, poorly spaced, or deteriorated framing may need repair or replacement before new decking is installed.
Build Your Deck With a Planning-First Approach
Choosing between TimberTech and Trex is important, but choosing the decking board is only one decision within a much larger project. Framing, drainage, flashing, fasteners, railings, stairs, layout, transitions, and construction sequencing all influence how your deck looks and performs years after installation.
At Evergreen Home Exteriors, we’re a Washington remodeling contractor focused on planning-first project delivery. We emphasize clear scope, clean sequencing, thoughtful material selection, and craftsmanship that looks great up close while performing long-term.
If you are considering a new deck or replacing an aging one, our team can help you evaluate your options, understand the trade-offs, and develop a plan that fits your home.
Schedule your FREE, no-pressure consultation with us today and start planning an outdoor space designed for lasting performance.
Western Washington winters do not ease you in. By October, King, Pierce, and Snohomish counties cycle through multi-day rain events that dump inches of water on rooftops untouched since spring. Composition shingle roofs are durable, but they are not impervious: the combination of persistent dampness, wind-driven rain, and organic debris accelerates wear in ways that are invisible from the ground. Moss colonizes north-facing slopes, gutters fill with fir needles, and flashing at roof-wall intersections quietly corrodes or separates. These failures do not announce themselves loudly; they accumulate over months. Neglect is costly. By the time a ceiling stain appears, or a soffit starts to sag, the repair bill reflects years of deferred attention. Getting ahead of winter means understanding how the wet season affects a composition roof, then acting before the first atmospheric river rolls in off the Pacific.
Preparing Your Composition Roof for Western Washington Winters
The counties making up Western Washington’s service corridor, including King, Pierce, Snohomish, Kitsap, Mason, Grays Harbor, Lewis, Skagit, Whatcom, Island, and Tacoma, share a climate defined by prolonged wet seasons rather than dramatic temperature swings. What this means for composition shingles is a sustained moisture load that the product is designed to handle, but only when the roof system as a whole functions correctly. Granule loss, aging sealant strips, and minor flashing gaps that would be inconsequential in a drier climate become active vulnerabilities under Western Washington winters, where rain events can last for days without a drying period in between. Here’s why that matters: choosing materials rated for this environment is essential. The guide to the best shingles for the Pacific Northwest covers the specific product characteristics that hold up under this kind of sustained moisture load, but even the most appropriate shingle requires a maintained roof system beneath it to perform as rated.
When a heavy rainstorm hits, water does not just fall straight down; it channels. Along roof-wall intersections, runoff accelerates and concentrates. If flashing at those junctions is inadequate, corroded, or missing entirely, that water finds its way behind the cladding and into the wall cavity. The damage from this kind of intrusion is slow and structural: framing members absorb moisture, insulation loses its thermal resistance, and mold establishes itself in cavities that are nearly impossible to remediate without opening the wall. Attic ventilation compounds the picture in a different way. Think of your attic like lungs; it needs to breathe. Without proper airflow, moisture gets trapped, which leads to mold and rots the structure from the inside out. A roof that sheds water effectively at the surface can still fail from the inside if the attic is not managing moisture exchange through adequate intake and exhaust ventilation.
Managing Moss and Moisture on Composition Shingles
The shaded, north-facing slopes common across Western Washington properties create near-ideal conditions for moss colonization. Overhanging Douglas firs and cedars drop debris that retains moisture against the shingle surface, and the region’s extended periods of low-light, high-humidity weather mean those surfaces rarely dry out completely between rain events. Moss prevention on composition roofs is not cosmetic: moss acts like a sponge, lifting shingle tabs at the edges and holding water directly against the roof deck. Over time, that trapped moisture accelerates granule loss, softens the mat beneath the shingle, and creates conditions for rot in the decking below. The same principle applies across the entire home envelope: just as you want to protect your deck from moisture to prevent structural deterioration at the deck framing level, the roof deck needs active management to stay structurally sound through repeated wet seasons. Shingle damage from moss is cumulative and largely invisible until it is severe, which is exactly why addressing it before winter, rather than after, changes the outcome. Do not wait.
A safe, methodical approach to moss mitigation makes a real difference when applied consistently:
Inspect from the ground first: Use binoculars to scan north-facing slopes and shaded sections for green or black discoloration before getting on a ladder. This gives you a baseline without unnecessary roof access.
Apply moss treatments on dry days: Apply a zinc- or potassium-salt-based moss treatment according to the product label, working on a dry day so the solution has time to penetrate before rain dilutes it. Eco-friendly formulations are widely available and are less likely to affect surrounding plantings or storm drain runoff.
Brush downward with care: If soft-brushing is needed to remove loose moss after treatment, use a soft-bristle brush and work downward from ridge to eave; never scrub against the shingle grain, which loosens granules and accelerates surface wear.
Avoid pressure washing entirely: Never use a pressure washer on composition shingles. High-pressure water strips the granule coating that protects the asphalt mat from UV degradation and moisture absorption, and most manufacturer warranties explicitly exclude damage caused by pressure washing.
Trim overhanging branches: Trim overhanging branches that deposit debris on the roof surface. The appropriate clearance distance varies by tree species, branch weight, and roof pitch. Consult a certified arborist for a site-specific recommendation rather than applying a generic figure.
Address moss early: Leaving moss untreated does shorten shingle lifespan, though the rate of degradation depends on moss species, shingle age, and climate exposure. No single percentage applies universally; the key takeaway is that the damage compounds the longer moss remains.
If you are not sure how far moss has progressed on your roof, a professional assessment before the heavy rains arrive is worth scheduling. Act early. Evergreen Home Exteriors offers low-pressure roof evaluations that identify moss colonization, granule loss, and structural concerns, with clear findings and no pressure to commit to work you do not need. Getting a clear picture of your roof’s condition in early fall gives you time to address issues on your schedule, not in response to an emergency.
Gutter and Downspout Maintenance for Heavy PNW Runoff
A clogged gutter during a heavy PNW rainstorm does not just overflow; it redirects water into places it was never meant to go. When gutters back up, water pools against the fascia board and finds its way behind the cladding at the roofline, particularly where flashing is undersized or has separated from the wall, as noted in the US Department of Energy Insulation Guide. The insidious part of this failure mode is that it is almost entirely hidden. Rot spreads quickly. Water intrusion behind the fascia can saturate the structural sheathing and begin rotting the rafter tails for months before any interior sign appears. By the time a homeowner notices a water stain on a ceiling or a soft spot in the soffit, the wood behind it has often been compromised for an entire wet season.
Washington State’s regulatory framework gives homeowners a useful reference point for understanding what a professional roof inspection covers. Under Washington Administrative Code WAC 308-408C-090, a standard roof inspection is defined to include the roof covering materials, gutter and downspout systems, visible flashings, roof vents, skylights, other penetrations, and the visible portions of chimneys and flues. That is a detailed scope; however, the same code explicitly states that inspectors are not required to walk on a roof if doing so is unsafe or could cause damage, and they are not required to clear snow, ice, or debris that blocks access to the roof surface. In practice, this means a professional inspection conducted during or after a storm may be limited to what is visible from the eave or from an adjacent structure. Safety comes first. Preventative seasonal maintenance by homeowners, such as clearing gutters, trimming debris-generating trees, and visually checking flashings before conditions deteriorate, fills the gap that those inspection limitations leave open.
Here’s a practical checklist for keeping gutters and downspouts functional through the wet season:
Use plastic tools for clearing: Gutter clearing should be done with a plastic scoop, not metal tools. Metal edges scratch the gutter coating and accelerate corrosion at the seams. Work from the downspout end toward the closed end so you are pushing debris away from the drain opening.
Flush the gutters with a hose: After clearing debris, flush the full length of each gutter run with a garden hose to confirm water flows freely to the downspout without pooling in low spots, which indicate a sag in the hanger alignment.
Perform downspout flushing: Flushing confirms the underground or surface drain path is clear. Run the hose directly into the downspout opening and watch the discharge point: a slow drain or backflow means a blockage somewhere in the run that needs clearing before storm season.
Check the gutter hangers: Check all gutter hangers and secure attachments to the fascia. Gutters loaded with water and debris are heavy, and a hanger that is pulled partially free will allow the gutter to tilt inward, directing overflow toward the fascia rather than away from it.
Inspect end caps and seams: Inspect end caps and seams for separation or rust staining, which indicates water is escaping before reaching the downspout.
Clear gutters are a home’s first line of defense against water damage. When they are blocked, every heavy rain becomes an opportunity for water to find its way behind the fascia, into the wall cavity, and eventually into the structure itself, accelerating wood rot and undermining the foundation’s drainage margin.
Inspecting Roof Flashing and Preventing Sidewall Leaks
Sidewall flashing at roof-wall intersections must be properly integrated with the home’s water-resistant barrier, whether that is housewrap or rigid foam insulation, and layered correctly with the shingles above it to prevent water from penetrating the wall cavity, as outlined in the US Department of Energy Insulation Guide. The integration sequence matters: flashing that sits on top of the housewrap rather than behind it creates a direct pathway for water to travel behind the barrier and into the framing. At the base of any roof-wall intersection where a roof plane terminates against a vertical wall, kick-out diverters are the critical detail. They prevent leaks. These small, angled metal pieces redirect the concentrated runoff that accumulates at the bottom of the flashing run away from the wall surface and into the gutter. Without them, that runoff, which can be substantial during a heavy PNW storm, drives directly into the wall cladding at the most vulnerable point in the assembly. The US Department of Energy Insulation Guide is specific on this: kick-out diverters must be continuous and properly sized for the roof pitch and rainfall volume to function correctly. A diverter that is undersized for the catchment area above it provides little meaningful protection. Ensuring the water-resistant barrier behind the cladding is continuous and correctly lapped at every flashing transition is the difference between a wall that manages water and one that absorbs it.
Flashing conditions are genuinely difficult to assess from the ground. Gaps are hidden. Separation at the wall integration point, undersized kick-out diverters, and gaps in the water-resistant barrier behind the cladding all require close inspection, and in most cases, a ladder and a trained eye. If you have not had your flashing evaluated recently, scheduling a professional inspection before the wet season is a practical step. Evergreen Home Exteriors’ team can identify integration failures at roof-wall intersections and confirm that your home’s water-resistant barrier is intact before the heavy rains test it.
Attic Ventilation and Preventing Winter Ice Dams
Ice dams are less common in Western Washington than in colder inland climates, but they do occur during freeze cycles; when they form on a composition roof, the consequences can be severe. Understanding the mechanics helps clarify why ventilation and insulation are the real solutions, not surface treatments. Prevention is key.
How melting snow refreezes: When the roof deck is warmer than freezing, typically because heat is escaping from the living space into the attic, snow on the upper portions of the roof melts and flows downward. At the eave, where the roof deck extends beyond the exterior wall and is no longer warmed by escaping heat, that meltwater refreezes, according to the US Department of Energy Insulation Guide.
The damage from pooled water: The ice ridge that forms at the eave acts as a dam. Water pooling behind it has nowhere to go except backward: up under the shingles, through the underlayment, and into the attic or wall cavity. In severe cases, the weight of accumulated ice and pooled water can threaten structural integrity, as noted in the US Department of Energy Insulation Guide.
The physical solution: The primary defense against ice dams is keeping the roof deck cold and uniform in temperature. That means adequate attic insulation to reduce heat transfer from the living space, combined with air sealing to stop warm air from bypassing the insulation layer entirely, as detailed in the US Department of Energy Attic Air Sealing Measure Guide.
Air leaks from the living space into the attic are a more significant driver of moisture problems than most homeowners realize. Warm indoor air carries moisture, and when it migrates through gaps in the ceiling plane into the cold attic, that moisture condenses on the cold roof sheathing, creating conditions for mold growth and wood rot that develop entirely out of sight, as documented in the US Department of Energy Attic Air Sealing Measure Guide. The instinct to address this by adding more insulation is understandable but incomplete. Air flows freely. Standard fibrous insulation, such as fiberglass batts or blown cellulose, slows conductive heat transfer but does not stop airflow. Convective currents moving through and around insulation can rob it of a significant portion of its rated R-value, which is why building scientists are consistent on the sequencing: air sealing must be completed before insulation is added, not after, per the US Department of Energy Insulation Guide. One of the most consequential air bypass locations in any attic is the chimney chase. The gap between the chimney and the surrounding ceiling framing is a direct pathway for warm, moist air to enter the attic. The correct approach is to fabricate a sheet metal dam that bridges the gap between the chimney and the framing, then seal any remaining cracks with high-temperature caulk: a detail that maintains the required fire safety clearances while closing the bypass, as noted in the US Department of Energy Attic Air Sealing Measure Guide. Getting this detail right matters more in a wet climate like Western Washington’s, where the moisture load on attic sheathing is already elevated by ambient humidity throughout the winter months.
Answers to Common Winter Roof Maintenance Questions
What is the 25% rule for roofing?
The 25% rule is a building code threshold that determines when a partial roof repair triggers a full code upgrade. If more than 25% of a roof’s total surface area is replaced or repaired within a 12-month period, the entire roof must be brought up to current building code standards, including updated underlayment, ventilation requirements, and flashing details. For homeowners managing an aging roof with localized damage, this threshold is worth understanding before authorizing piecemeal repairs, since crossing it changes the scope and cost of the project significantly.
What time of year is best to clean a roof?
Late spring and early fall are generally the most practical windows for roof cleaning. Mild temperatures allow chemical moss treatments to work at their intended concentration: extreme cold slows the reaction, and summer heat can cause some formulations to evaporate before they penetrate. Early fall is particularly useful in the PNW because it gives treatments time to work before the wet season begins, rather than applying them to a roof that is already saturated and cycling through rain events every few days.
What temperature is too cold to roof a house?
Installing asphalt shingles below 40°F (4°C) is generally discouraged. At those temperatures, shingles become more brittle and are more susceptible to cracking during handling and nailing. More critically, the adhesive strips on the shingle tabs require solar heat to activate and form a proper seal: without that seal, shingles can lift in wind and allow water infiltration. Western Washington’s shoulder seasons, running from October through March, can push temperatures close to or below this threshold, which is one reason fall installation windows are preferred over winter ones.
What can I put on my roof to stop ice dams?
The most durable solution is addressing the root cause: keeping the roof deck cold by improving attic insulation and sealing air leaks so heat from the living space does not warm the sheathing. For immediate protection at the eave, self-adhering waterproof underlayment, commonly called ice and water shield, creates a secondary barrier that prevents water backed up behind an ice dam from penetrating the roof assembly. Heated cables, or heat tape, installed along the eave and in gutters can also create drainage channels through the ice, though they address the symptom rather than the cause and add ongoing energy costs.
How do roofers get rid of ice dams?
Professional roofers typically use low-pressure steam equipment to melt ice dams without the mechanical force that would damage shingles or granules. Steam is slower than chipping but preserves the roof surface. For snow removal before an ice dam fully forms, long-handled roof rakes allow homeowners to pull snow back from the eave edge from the ground, reducing the melt volume that reaches the eave and lowering the risk of dam formation during a freeze cycle. Mechanical chipping is generally avoided by professionals because it is difficult to distinguish ice from shingles in cold conditions, and the risk of granule loss or shingle cracking is high.
Contact Us Today
A composition roof in Western Washington faces a cumulative test every winter: not a single dramatic event, but months of persistent moisture, organic debris, and temperature cycling that gradually expose every weakness in the system. The homeowners who come out of winter without emergency repairs are almost always the ones who spent a few hours in September and October doing the unglamorous work: clearing gutters, checking flashing, treating moss, and confirming the attic is sealed and ventilated. None of it is complicated, and most of it is visible from a ladder or the ground. Plan ahead. What makes it matter is doing it before the atmospheric rivers arrive, not after the ceiling shows the consequences.
Evergreen Home Exteriors’ residential roofing contractors serve homeowners across King, Pierce, Snohomish, Kitsap, Mason, Grays Harbor, Lewis, Skagit, Whatcom, and Island counties, as well as Tacoma. Schedule a professional roof assessment before the wet season sets in: call (253) 320-5383 today.
“The new siding installed by Evergreen didn’t just improve the look of our home; it insulated better and reduced our energy bills. When we sold our property, buyers were immediately drawn to the modern curb appeal and quality construction.” – Jason R. from Tacoma
The choice between metal roofing and asphalt shingles hinges on your long-term plans and budget. Asphalt shingles offer a reliable, accessible solution for homeowners who want solid weather protection without a high upfront cost. Metal roofing is a different investment: a higher-cost, low-maintenance system built for long-term performance, where the financial return develops over decades. Evaluating the physical properties, actual costs, and Pacific Northwest climate performance of both materials helps clarify which option fits your home’s specific needs.
Understanding the Materials: Composition and Thermal Performance
Asphalt shingles are overlapping panels built from a fiberglass asphalt core coated with mineral granules that provide physical protection and UV resistance, as documented in the US Department of Energy Cool Roof Guide. Metal roofs come in three primary surface configurations: natural metallic finishes, oven-baked paint finishes, and granular-coated surfaces, according to the same guide. Each finish type carries different thermal characteristics, and this distinction matters far more than most homeowners realize when comparing long-term performance. If you are weighing these two materials alongside other options like slate, our breakdown of asphalt vs. metal vs. slate shingles covers the full spectrum of residential roofing materials available in the Pacific Northwest.
Your roof’s thermal behavior is governed by two measurable surface properties: solar reflectance and thermal emittance. Solar reflectance is the fraction of incoming sunlight a surface reflects, expressed on a scale from 0 to 1. Typical dark roofing materials reflect only 5% to 20% of incoming light, while light-colored materials reflect 55% to 90%, according to the US Department of Energy Cool Roof Guide. Thermal emittance measures how efficiently a surface radiates the heat it has already absorbed back into the atmosphere rather than transferring it into the home below. These two properties combine to produce the Solar Reflectance Index (SRI), where a higher value indicates a cooler roof surface under direct sun.
The practical stakes are substantial. Heat transfer drives cooling costs. Traditional dark roofs can reach surface temperatures of 150°F or higher in the summer sun, while a well-engineered cool roof can stay more than 50°F cooler. High-efficiency cool roofs can stay up to 60°F cooler than traditional black roofs during peak summer conditions, according to the Federal Energy Management Program Cool Roof Purchasing Guide. This translates directly into reduced attic heat transfer and lower air conditioning loads. Think of it like wearing a light-colored cotton shirt on a hot day instead of a dark wool sweater: one reflects the heat, while the other traps it. One counterintuitive finding is that unpainted metal roofs, despite having high solar reflectance, are poor thermal emitters. They retain heat rather than shedding it, meaning they do not satisfy low-slope cool roof requirements, though they typically meet steep-slope standards. To maximize energy efficiency, we recommend avoiding unpainted metal and bare aluminum coatings in favor of light-colored painted finishes.
Asphalt Shingles: The Cost-Effective Industry Standard
GAF architectural shingles are the primary asphalt line installed by Evergreen Home Exteriors, and they serve as the benchmark against which most residential roofing decisions are measured. These shingles combine a durable fiberglass asphalt composition with protective mineral granules, delivering reliable weather resistance at a fraction of the cost of premium alternatives. The 30-year expected lifespan of a high-quality shingle roof closely aligns with the service life of modern roof-integrated solar components, as noted in the US DOE Building Integrated Photovoltaics Summary, which serves as a useful benchmark for homeowners planning long-term energy upgrades alongside a roof replacement.
A common concern is whether architectural shingles can withstand the coastal winds and sustained heavy rain that define Western Washington weather. Our local weather is relentless. Modern architectural shingles address this directly through advanced sealing strips and heavy-duty fiberglass mats that provide strong wind-uplift resistance without requiring the premium investment of a metal system. The exact wind speed rating and accessory requirements for GAF’s WindProven limited wind warranty are specifications your installation consultant can verify at the time of your project assessment, as those figures depend on the specific product line and installation configuration selected.
Lower Upfront Cost: Requires a significantly lower initial investment compared to metal roofing, preserving immediate budget flexibility.
Proven Durability: High-quality architectural shingles offer a reliable 30-year service life (per the US DOE Building Integrated Photovoltaics Summary).
Ease of Installation and Repair: Standardized installation processes mean shorter project timelines and simpler, highly localized repairs if damage occurs.
Minimal Price Premium for Cool Technology: Cool asphalt shingles carry a $0.00 price premium for white granules and a modest $0.35 to $0.75 per square foot premium for cool-colored granules (per the US Department of Energy Cool Roof Guide).
If you want to explore the best roofing options for your home, contact Evergreen Home Exteriors today at (253) 320-5383 to schedule your free, no-pressure consultation for roof replacement and repair. Our team will help you compare GAF architectural shingles and custom metal options tailored to your home’s unique structure and local microclimate.
Metal Roofing: The Premium, High-Durability Shield
Metal roofing earns its premium price tag largely through longevity. Because standing-seam metal and other painted metal systems maintain lower average operating temperatures than dark asphalt roofs, they experience slower rates of heat-related material degradation and color fading over time, as noted in the US Department of Energy Cool Roof Guide. From a cost-premium standpoint, unpainted metal carries a $0.00 finish premium, factory-applied white paint adds $0.20 per square foot, and cool-colored painted finishes range from $0.00 to $1.00 or more per square foot above base material costs. The specific upfront installation cost relative to asphalt shingles depends on your roof’s geometry, square footage, and the metal system selected: these are figures your Evergreen consultant will walk through in detail during your assessment.
The noise concern warrants a direct answer. When metal roofing is installed over solid roof decking with modern underlayment, the insulating layers between the metal surface and your living space absorb the acoustic impact of rain. The difference in interior sound levels compared to a properly installed asphalt roof is negligible under normal rain conditions.
Modern residential metal roofing has moved well past the corrugated agricultural aesthetic that still shapes many homeowners’ mental image of the material. Standing-seam panels and residential metal shingles are now manufactured to replicate traditional architectural styles, such as cedar shakes, slate profiles, and dimensional tiles, or to express clean, contemporary lines that read as intentionally modern rather than industrial. The aesthetic options are remarkably broad. That said, we consistently recommend painted systems over unpainted metal regardless of style preference: unpainted metal’s poor thermal emittance means it retains heat rather than radiating it away, which undermines the energy efficiency argument for the premium investment.
Extended Service Life: Lower operating temperatures slow the physical aging and weathering of the roof assembly (per the US Department of Energy Cool Roof Guide).
Low Maintenance: Highly resistant to moss, algae, and organic rot, with surface angles that allow debris like pine needles to shed easily.
Excellent Solar Reflectance: Reflects up to 90% of incoming light when painted with light-colored finishes (per the US Department of Energy Cool Roof Guide).
High Fire Resistance: Non-combustible material properties provide an additional safety margin in fire-adjacent environments.
“The new siding installed by Evergreen didn’t just improve the look of our home; it insulated better and reduced our energy bills. When we sold our property, buyers were immediately drawn to the modern curb appeal and quality construction.” – Jason R. from Tacoma
Weathering the Pacific Northwest: Climate-Specific Performance
Identifying the right climate-resilient roofing options for Western Washington means confronting a set of stressors that do not appear in most national roofing guides: persistent dampness, dense tree canopies dropping organic debris year-round, and sustained overcast periods that keep surfaces cool and wet for weeks at a stretch. The Puget Sound region sits within Climate Zone 4. Our climate demands careful planning. In cold, wet climates like Seattle, roofs face a specific vulnerability, which is moisture accumulation through condensation, which can accelerate material degradation if the roof assembly is not engineered to manage it, as documented in the US DOE Home Retrofits Guide.
This is where the cool roof debate becomes complex, and there is no simple answer. Because cool roofs maintain lower average surface temperatures, they provide less residual heat to drive moisture evaporation from the assembly. Some researchers argue this makes cool roofs more susceptible to condensation and subsequent degradation than traditional dark roofs of the same design in cold climates, though the US Department of Energy Cool Roof Guide notes there is currently no definitive data confirming a higher occurrence rate in cool roofs compared to dark roofs of the same construction. Ponding water from frequent Pacific Northwest rain also takes longer to evaporate from a cool roof’s lower-temperature surface. This means roofs that cannot tolerate standing water require more frequent inspection intervals. In warm, moist conditions, which the PNW experiences during summer months, cool roof surfaces can be more susceptible to algae and mold growth than hotter roofs, though this is addressable through chemical additives in roof coatings.
Do not let Western Washington’s damp climate compromise your home’s structural integrity. Contact Evergreen Home Exteriors today at (253) 320-5383 to schedule a detailed, weather-resilient roof inspection. Our planning-first approach ensures we identify potential moisture and ventilation issues before installation begins.
Comparing Lifetime Costs and Energy Efficiency
Upfront Cost vs. Long-Term Value: Outright replacement of a roof is generally not a cost-effective measure solely for energy savings (per the US DOE Home Retrofits Guide). However, during a planned replacement, investing in reflective materials can lower long-term utility costs.
The Energy Math in Climate Zone 4: In the Puget Sound region, a typical pre-code single-family home with a gas furnace and gas water heating has an annual baseline energy use of 6,836 kWh of electricity and 1,083 therms of natural gas, resulting in an annual energy cost of $1,918 based on statewide utility rates of $0.0804/kWh for electricity and $1.262/therm for natural gas (per the US DOE Home Retrofits Guide).
Winter vs. Summer Trade-Offs: While cool roofs achieve the greatest cooling savings in hot climates, they can slightly increase energy costs in colder climates like the PNW due to reduced beneficial wintertime heat gains (per the Federal Energy Management Program Cool Roof Purchasing Guide).
The Ventilation Solution: To optimize performance and manage both thermal and moisture risks, high-efficiency roof and attic assembly solutions, such as vented attics insulated over the ceiling deck or unvented attics insulated with rigid foam above the roof deck, are highly recommended.
The home tenure question is the clearest framework for making this decision. How long will you stay? If you expect to be in your home for 15 years or fewer, GAF architectural shingles provide outstanding, cost-effective weather protection that will comfortably exceed your tenure without requiring a second replacement cycle. If you are building or maintaining a lifetime home, meaning one you intend to occupy for decades or pass to family, the higher upfront cost of a painted metal system is offset by its resistance to degradation, lower ongoing maintenance demands, and the elimination of future replacement costs. The metal system’s financial advantage only materializes over a long enough time horizon to absorb its installation premium, and that is not a caveat worth overlooking.
Frequently Asked Questions About Metal and Asphalt Roofs
Do insurance companies prefer metal roofs?
Yes, many insurance companies prioritize metal roofs because they are highly durable, fire-resistant, and can withstand severe weather. This superior durability often leads to discounts on homeowners’ insurance premiums, helping offset the initial installation cost over time.
Why don’t more people use metal roofs if they last longer?
The chief obstacles are the higher initial installation cost compared to asphalt shingles, misconceptions about rain noise, and aesthetic preferences. Many homeowners are also unaware of modern residential metal styles that mimic traditional shingles or shakes, assuming all metal roofs look industrial.
What are the main disadvantages of a metal roof?
The primary disadvantages include high upfront installation costs, the requirement for highly specialized contractors, and the potential for denting from extremely large hail. Additionally, unpainted metal roofs are poor thermal emitters, meaning they must be painted with a high-quality finish to meet energy-efficiency standards (per the US Department of Energy Cool Roof Guide).
How does ponding water affect a cool metal or asphalt roof?
Ponding water from rain takes longer to evaporate from a cool roof due to its lower surface temperature (per the US Department of Energy Cool Roof Guide). In wet climates, this requires more frequent roof inspections to prevent leaks if the roofing material or slope design cannot tolerate standing water.
Is a metal roof worth the extra cost in a cold, wet climate?
A metal roof is worth the investment if you prioritize long-term durability, low maintenance, and shedding organic debris. However, because cool roofs provide less heat to dry out moisture, they must be paired with proper attic ventilation solutions, such as vented attics insulated over the ceiling deck, to prevent condensation in cold climates (per the US DOE Building America Case Study).
Contact Us Today
Choosing between metal roofing and asphalt shingles is a major decision that shapes your home’s protection and value for decades. Your choice matters. At Evergreen Home Exteriors, we believe in a planning-first approach, presenting you with clear options and their trade-offs so you can make the best choice for your budget and home tenure. Whether you choose the reliable value of GAF architectural shingles or the premium durability of a painted metal system, our craftsmanship ensures your roof performs flawlessly under Western Washington’s unique climate demands.
Let’s build a roof that lasts. Contact the practical experts at Evergreen Home Exteriors today. Call us at (253) 320-5383 to schedule your free, detailed roof assessment. We proudly serve homeowners across King, Pierce, Snohomish, and Kitsap counties with transparent planning and craftsmanship that performs.