A roof storm damage insurance claim is warranted when a storm causes sudden, accidental physical damage, such as wind-lifted shingles, hail-induced fractures, or flashing displacement, that undermines your roof’s ability to shed water, and when the cost to restore it exceeds your policy deductible. That is the threshold. Everything else is a judgment call that requires documentation, a professional eye, and an honest accounting of your policy terms before you pick up the phone to notify your carrier.
What makes this genuinely difficult is that the most severe damage often does not announce itself from the driveway. A roof can look intact from ground level while broken sealant bonds, micro-fractured shingles, and displaced flashing are quietly channeling moisture into the roof deck below. In Western Washington, where persistent rainfall follows every windstorm, that concealed intrusion path accelerates wood rot and mold in ways that compound fast. Rot spreads quickly here. A roof that survived a storm structurally can still be months away from a failed deck; by the time water stains appear on the ceiling, the remediation scope has expanded well beyond what a timely inspection would have caught.
Understanding Homeowners Insurance Coverage for Roof Storm Damage
Standard homeowners insurance is structured to cover sudden and accidental direct physical loss from covered perils: wind, wind-driven rain, hail, falling trees, and heavy snow or ice accumulation, per the National Roofing Contractors Association (NRCA) and the Washington State Office of the Insurance Commissioner (WA OIC). The key word is “sudden.” The policy is designed for discrete weather events, not for the gradual deterioration of materials over time. Policies explicitly exclude normal wear and tear, aging, poor maintenance, and improper installation, per the National Roofing Contractors Association. That exclusion carries real weight: an adjuster who identifies pre-existing deterioration can attribute a portion of the damage to maintenance neglect rather than the storm, reducing or eliminating the covered scope.
The distinction between functional storm damage and cosmetic issues is where most homeowners get tripped up. The difference is critical. Functional damage degrades the roof’s water-shedding capacity, such as a lifted shingle seal, a cracked reinforcement mat, or a bent flashing section. Cosmetic issues, such as minor surface discoloration or shallow dents on non-structural components, may not meet the threshold for a covered loss, and in some policies they are explicitly carved out. This distinction matters beyond the immediate claim, too. Filing any claim, including one that results in a small payment or gets denied after review, can be recorded on your policyholder history and affect future premiums or renewal eligibility, per the National Roofing Contractors Association and the Washington State Office of the Insurance Commissioner. That is a consequential downstream cost that most homeowners do not factor in when they are standing in the driveway after a storm.
Identifying Signs of Roof Storm Damage: Wind, Hail, and Falling Debris
High winds generate wind uplift forces that break the manufacturer’s adhesive sealant bond holding shingles in place. Once that bond fails, shingles lift, crease, or detach entirely, exposing the underlayment and fasteners beneath. This leaves the roof vulnerable. Beyond the shingles themselves, wind displacement frequently affects the metal flashing at chimneys, dormers, and roof-wall intersections, as well as ridge caps and penetration seals, all of which are direct water-entry points when compromised, per the National Roofing Contractors Association. In Western Washington, the risk profile extends further: saturated soils and heavy coastal gusts regularly bring down falling evergreen limbs that cause structural impact damage and create storm-opened penetrations that admit water immediately, per the Washington State Office of the Insurance Commissioner. The combination of wind damage and falling debris in a single storm event is common here, and the two damage types often overlap in ways that require careful documentation to separate.
The following signs warrant a professional inspection after any significant storm event:
Wind-lifted or missing shingles: High winds break the adhesive seal, causing shingles to lift, fold, or detach from the roof slope. Inspect for creased or folded shingles, exposed underlayment, and protruding fasteners; each represents an active leak path. Saturated soils and heavy coastal gusts in Western Washington frequently compound this damage through falling evergreen limbs that create additional storm-opened penetrations, per the Washington State Office of the Insurance Commissioner.
Flashing displacement: Metal flashing around chimneys, dormers, and roof valleys is highly susceptible to wind displacement. Bent, separated, or missing flashing sections allow wind-driven rain to bypass the shingle layer and penetrate the roof deck directly. Even a small gap in valley flashing can funnel substantial water volume during a Pacific Northwest rainstorm.
Bruised or fractured shingles from hail: Functional hail damage on asphalt shingles typically involves fractured reinforcement, displaced granules, or impact bruising, per the National Roofing Contractors Association. A bruised shingle feels like a soft spot: the underlying mat has been crushed without necessarily cracking through. That structural compromise accelerates shingle failure and eventual water intrusion, often within one to two wet seasons.
Granule accumulation in gutters: Heavy storm winds and hail accelerate granule loss from asphalt shingles. Gutters and downspout outlets that collect an unusual volume of granules after a storm are a reliable indicator of surface damage. Granule loss strips the UV-protective layer from the underlying asphalt, hastening oxidation and brittleness across the affected slopes.
Dents on soft metals: Dents on gutters, downspouts, vents, and screens, which adjusters call collateral damage, serve as supporting evidence of storm intensity and direction, per the National Roofing Contractors Association. An adjuster who finds consistent denting patterns across multiple soft-metal surfaces has objective proof that a qualifying weather event occurred, which strengthens the covered-peril determination for the shingle damage above.
Concerned about what a recent storm left behind? Evergreen Home Exteriors provides professional, no-obligation storm damage assessments for homeowners across Western Washington. Our team inspects what ground-level observation misses, including broken seals, flashing displacement, and impact bruising, and provides a documented report before you contact your carrier. Explore our roof replacement and repair services, or call us directly at (253) 320-5383. We are located at 11507 Steele St S, and we bring the same engineering precision to every inspection that Pacific Northwest weather demands.
How Insurance Adjusters Evaluate Roof Storm Damage
When an adjuster arrives at your property, their investigation follows four axes: cause of loss, coverage applicability, scope of damage, and repair cost, per the National Roofing Contractors Association. The cause-of-loss determination is the most consequential step; it establishes whether the damage originated from a covered peril or from a pre-existing condition. To measure the extent of damage, adjusters typically mark out a standardized grid-based test area, often a 10-by-10-foot square, on multiple roof slopes and count the number of functional damage marks within each grid. That count informs whether the damage density meets the threshold for a full slope replacement versus a localized repair. Every mark matters. Homeowners who arrive at this inspection without documented evidence, such as photographs taken immediately after the storm, a professional inspection report, and weather data for the event date, are at a disadvantage. The adjuster’s grid count is objective, but their interpretation of whether each mark is storm-caused or age-related is not.
Adjusters are specifically trained to distinguish covered storm damage from a range of non-covered conditions, including heat blistering, thermal cracking, manufacturing variations, foot traffic wear, tree abrasion, and normal aging, per the National Roofing Contractors Association. Each of those conditions can produce surface marks that superficially resemble storm damage, and an adjuster who identifies them can reclassify the damage accordingly. A pre-inspection by a qualified roofing contractor before the adjuster’s visit addresses this directly: the contractor establishes the storm-caused scope, documents the specific characteristics of each damage type, and provides a professional report that gives the adjuster a baseline to work from rather than starting from scratch. That pre-inspection report does not guarantee a favorable outcome, but it substantially reduces the risk of legitimate storm damage being misattributed to maintenance neglect.
What to Expect from a Professional Roof Inspection
Hiring professional roofers for the inspection: Homeowners should not attempt to access a damaged, wet, or steep roof independently; the safety hazards are material, per the National Roofing Contractors Association and the Washington State Office of the Insurance Commissioner. A qualified contractor brings the safety equipment, training, and damage-pattern recognition that a ground-level walk-around cannot replicate. For guidance on selecting a qualified contractor, see hiring professional roofers before you schedule.
Documenting physical evidence: A qualified contractor safely catalogs physical evidence, including photographs of each damage type, measurements, and material condition notes, and evaluates whether the repair cost exceeds the deductible before you formally notify the insurer, per the National Roofing Contractors Association. Detailed photo documentation and a written inspection report give the adjuster objective proof to work from, reducing the likelihood of claim denial or underpayment due to insufficient evidence.
Cross-referencing damage patterns: Adjusters cross-reference shingle bruising, flashing displacement, and soft-metal denting to establish both the storm’s intensity and its direction of travel. They verify that the damage pattern is consistent with a recent covered event rather than accumulated wear, and they use collateral damage on gutters, vents, and screens as corroborating physical evidence of the storm’s reach.
“Under state laws in jurisdictions like Texas, contractors cannot legally act as public adjusters or negotiate claims on behalf of the homeowner while also performing the repair work. Furthermore, schemes where contractors offer to waive, rebate, or absorb deductibles are illegal. Homeowners must always pay their deductible and work with registered, ethical contractors.” – National Roofing Contractors Association
Steps to Take Immediately After Roof Storm Damage
Your first obligation after a storm is to prevent further damage to the property. That means arranging emergency tarping over any breached roof sections, boarding up storm-created openings, and clearing debris that could cause secondary structural stress, all before the next rain event arrives, per the National Roofing Contractors Association and the Washington State Office of the Insurance Commissioner. Failing to take those prevention steps can give your insurer grounds to deny coverage for subsequent water damage, on the basis that the additional loss was avoidable. Alongside mitigation, you need to document the property thoroughly: wide-angle photographs of the full roof perimeter, close-up shots of specific damage points, and images of collateral damage on gutters, vents, and any fallen debris. Take those photographs before any cleanup begins. Once debris is removed and tarps are in place, the original damage state is harder to reconstruct from photographs alone, and that gap in documentation can complicate the claim.
Before you file, get the full picture. Evergreen Home Exteriors offers a no-obligation storm damage assessment that documents the scope and cause of damage before your carrier is notified. Our planning-first approach means you understand exactly what you are dealing with, and whether filing a claim is the right move, before any decisions are locked in. Call (253) 320-5383 or visit us at 11507 Steele St S to schedule your assessment.
Is It Worth Filing a Roof Insurance Claim?
The financial analysis here is more nuanced than it first appears, and there is no clean universal answer. Take time to evaluate. The right decision depends on repair cost, deductible amount, roof age, policy type, and your insurer’s claims history practices, all of which interact differently in every situation.
Comparing repair costs to your deductible: If the repair estimate is only marginally above your deductible, the net insurance payout may not justify the claim. Even claims that fall below the deductible threshold or are ultimately excluded after review can be recorded on your policyholder history, per the National Roofing Contractors Association. A professional repair estimate from a qualified contractor gives you the actual cost figure you need to make that comparison accurately, rather than guessing.
Impact on future premiums: The Washington State Office of the Insurance Commissioner notes that filing a claim can increase premiums or lead to policy non-renewal, even when the claim results in a modest payment. That downstream cost is real and should be weighed against the immediate repair expense. For minor damage, such as a handful of lifted shingles or localized granule loss, absorbing the repair cost out of pocket may be the more financially sound choice over a three-to-five-year horizon.
Evaluating the age and material of your roof: Older roofs may qualify only for Actual Cash Value (ACV) rather than Replacement Cost Value (RCV), meaning the payout reflects the depreciated value of the materials rather than the cost to replace them at current prices. If your roof is approaching the end of its rated service life, the ACV payout may be substantially lower than the actual repair cost. This is also a reasonable moment to evaluate whether upgrading to the best shingles for the Pacific Northwest, which are materials engineered for sustained wind and moisture exposure, makes sense as part of the repair scope.
Policy exclusions like landslides: Heavy winter rains in Western Washington can destabilize slopes and trigger landslides. Landslides are explicitly excluded from standard homeowners policies and require separate coverage to be insured, per the Washington State Office of the Insurance Commissioner. If your property sustained damage from both a windstorm and a landslide in the same event, understanding which exclusions apply to which damage type is essential before filing.
Under replacement-cost value (RCV) policies, the claims payment process unfolds in two stages: the initial check covers the actual cash value (ACV) of the damaged materials minus your deductible, and the recoverable depreciation is released only after the approved repair work is completed and documented, per the National Roofing Contractors Association. That staged structure means you will need working capital to initiate repairs before the full payout arrives; this is a practical consideration when selecting a contractor and planning the project timeline. In Washington, any contractor performing emergency mitigation or permanent repairs must be registered with the state, per the Washington State Office of the Insurance Commissioner. Verifying registration before signing a contract protects against both substandard work and the fraud schemes that proliferate after major storm events.
Frequently Asked Questions About Roof Storm Damage Claims
Is roof damage from a storm covered by insurance?
Generally, yes. Standard homeowners insurance covers sudden and accidental direct physical loss from covered perils like wind, wind-driven rain, hail, falling trees, and snow or ice damage, per the National Roofing Contractors Association and the Washington State Office of the Insurance Commissioner. However, policies do not cover normal wear and tear, aging, poor maintenance, or improper installation. The age and condition of the roof at the time of the storm can also affect the payout structure: older roofs may receive ACV rather than RCV settlements, which changes the net recovery amount.
What should you avoid saying to an insurance adjuster during a roof inspection?
Avoid admitting fault, speculating about the cause or timing of the damage, or characterizing the damage as “old” or “just wear and tear.” Those statements can give the adjuster grounds to reclassify covered storm damage as a maintenance issue. Stick to the documented facts of the storm event and let your professional roof inspection report carry the supporting weight. If you’re uncertain about a question, it’s reasonable to say you’ll follow up rather than speculate on the spot.
How long after a storm can you file a roof insurance claim?
Filing as promptly as possible is the right approach, regardless of your policy’s specific deadline. Prompt action lets you document the initial damage state before weather or cleanup alters the evidence, arrange emergency mitigation to prevent secondary water damage, and establish a clear timeline that connects the damage to the storm event, per the National Roofing Contractors Association and the Washington State Office of the Insurance Commissioner. Delayed filing can complicate the cause-of-loss determination and give the adjuster reason to question whether the damage predates the storm.
Will filing a storm damage claim make my homeowners insurance rates go up?
It is possible. The Washington State Office of the Insurance Commissioner notes that filing a claim can increase premiums or lead to non-renewal, even for small payments. This is why comparing the repair cost against your deductible, and factoring in the potential premium impact, before filing is a sound practice. For minor damage where the net payout would be modest, paying out of pocket may be the more cost-effective path over the life of the policy.
What should you not tell a home insurance adjuster?
Never exaggerate the extent of the damage, volunteer theories about causes you cannot verify, or sign any settlement documents before you fully understand what the approved scope covers. Settlement documents can close out your claim before hidden damage, such as rotted decking discovered during tear-off, or code-required upgrades are accounted for, per the National Roofing Contractors Association. Those items often require supplemental documentation and negotiation, and signing prematurely forfeits your ability to pursue them.
Call Us Today
A planning-first approach to storm damage is the most reliable way to protect both your home and your insurance standing. Getting a professional inspection before contacting your carrier gives you an accurate picture of the damage scope, a documented baseline for the adjuster’s visit, and the information you need to decide whether filing a claim is financially sound. Skipping that step and filing on instinct, or, worse, letting a storm-chasing contractor drive the process, introduces risk at every stage: claim denial, underpayment, premium increases, and potential exposure to contractor fraud.
The roof over a Pacific Northwest home works hard. Persistent rain, coastal wind loads, and falling debris from mature evergreens create a damage environment that’s unforgiving of deferred maintenance and undetected storm compromise alike. Addressing damage promptly, with qualified professionals and documented evidence, is how you keep a manageable repair from becoming a structural replacement.
Protect your home with a professional storm damage assessment from Evergreen Home Exteriors. Our team serves homeowners across Pierce County, King County, Snohomish County, and throughout Western Washington, bringing the same precision and craftsmanship to every inspection that the region’s weather demands. Call (253) 320-5383 to schedule your no-obligation assessment.
Evergreen homeowners have seen what that commitment to craftsmanship delivers firsthand:
“The new siding installed by Evergreen didn’t just improve the look of our home; it insulated better and reduced our energy bills. When we sold our property, buyers were immediately drawn to the modern curb appeal and quality construction.” – Jason R. from Tacoma
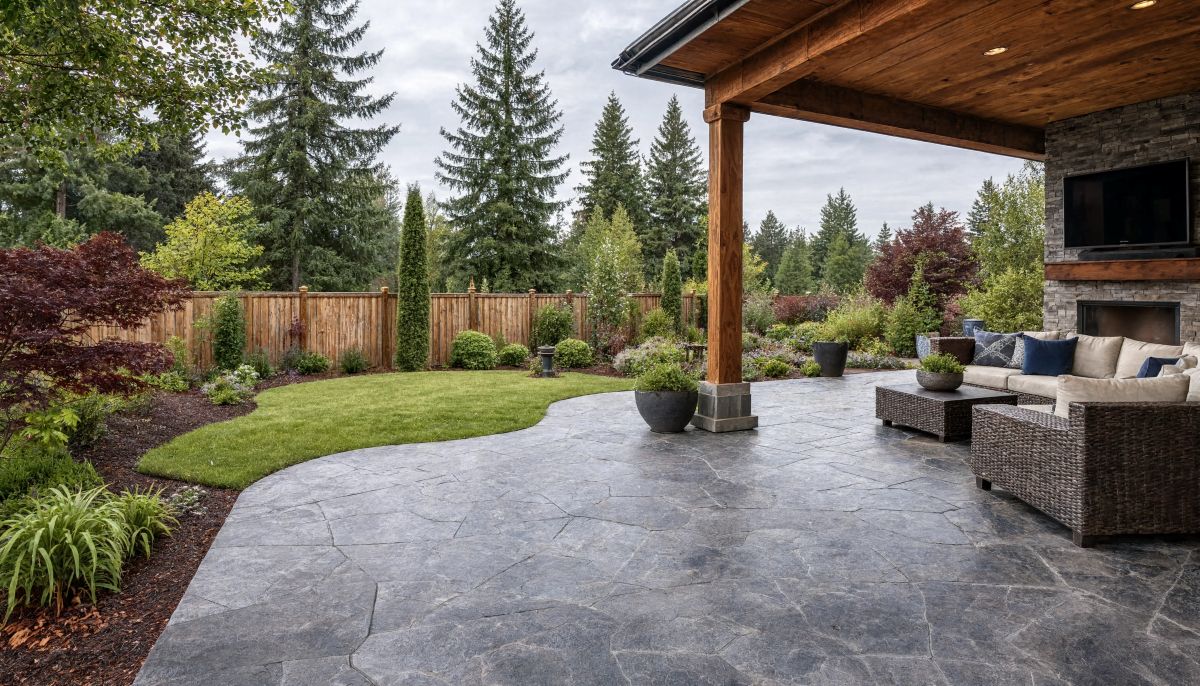
If you are planning a new patio, walkway, pool deck, or outdoor living area, one of the first questions you may ask is: Is stamped concrete cheaper than pavers? In many cases, stamped concrete has a lower initial installation cost than individual concrete, brick, or natural stone pavers. However, the most affordable choice over the life of the project depends on more than the price per square foot. Site preparation, drainage, design complexity, maintenance, repairs, climate exposure, and expected service life all affect the final cost. For Washington homeowners, it is especially important to consider moisture, freeze-thaw cycles, soil movement, and proper water management before choosing a surface.
The Basic Cost Difference Between Stamped Concrete and Pavers
Stamped concrete is generally poured as one continuous slab. Before the concrete fully cures, installers press textured mats into the surface to create the appearance of stone, brick, slate, wood, or another material. Color may be incorporated into the concrete mix, applied to the surface, or added through a combination of methods.
Pavers are manufactured as separate units and installed individually over a prepared base. Depending on the project, they may be made from concrete, clay brick, porcelain, or natural stone. The installation process usually requires excavation, compacted aggregate, bedding material, edge restraints, joint filling, and careful alignment.
Because stamped concrete can cover a large area in a relatively efficient pour, it often costs less upfront than a comparable paver installation. Pavers require more individual placement and can involve greater labor demands. Natural stone pavers may also carry significantly higher material costs.
Still, a lower starting price does not automatically make stamped concrete the best value. The full answer depends on the design, site, and long-term expectations.
Why Stamped Concrete Often Costs Less Upfront
Stamped concrete combines structural concrete and decorative finishing into one installation process. Once the site is excavated, formed, reinforced, and prepared, the crew can pour the slab and apply the decorative pattern before the concrete sets.
This process may reduce installation time compared with placing hundreds or thousands of individual pavers. It also avoids the need to purchase separate paving units for the entire surface. The savings can be especially noticeable on broad, relatively simple areas such as rectangular patios or straight walkways.
Several factors commonly make stamped concrete more economical at the beginning of a project:
Faster coverage of large areas
Fewer individual materials to place
Lower material costs than many natural stone products
Efficient installation for simple shapes
Decorative appearance without purchasing premium masonry units
However, stamped concrete is still a skilled installation. Proper finishing requires timing, coordination, and experience. The crew must place, color, stamp, and protect the concrete within a limited working window. Complex borders, multiple colors, detailed patterns, or difficult access can increase labor and narrow the cost difference.
When Pavers May Offer Better Long-Term Value
Pavers often have a higher upfront cost, but they provide a major advantage when repairs are needed. Because the surface consists of individual units, a contractor can typically remove and replace damaged pavers without rebuilding the entire area.
For example, if underground plumbing or drainage work requires access beneath a paver patio, the affected units may be lifted, stored, and reinstalled after the work is complete. If a few pavers become stained or damaged, only those pieces may need replacement.
Stamped concrete does not offer the same flexibility. A crack can sometimes be repaired, but the patch may remain visible because matching the original texture and color is difficult. Larger failures may require removing and replacing a section of the slab. Even when the repair is structurally sound, it may not blend perfectly with the surrounding surface.
Pavers may offer better long-term value when:
The soil is prone to minor movement
Future access beneath the surface may be necessary
The homeowner wants easier localized repairs
Matching replacement units are available
Long-term appearance is more important than the lowest initial price
The right decision depends on whether you prioritize immediate affordability or repair flexibility over time.
Site Preparation Affects Both Options
A decorative surface is only as reliable as the base beneath it. Whether you choose stamped concrete or pavers, inadequate excavation, poor compaction, or incorrect drainage can lead to settlement and premature damage.
For stamped concrete, the base must support a continuous slab while helping manage moisture and soil movement. Reinforcement, slab thickness, control joints, grading, and drainage details must be planned before the pour begins. Concrete naturally shrinks as it cures, so control joints are used to encourage cracking in planned locations.
Pavers also depend on a stable, well-compacted base. If the base is too thin or unevenly compacted, the pavers may settle, tilt, or separate. Edge restraints are also important because they prevent the field of pavers from gradually spreading outward.
Cutting costs during site preparation can make either material more expensive in the long run. A planning-first contractor will evaluate the soil, slope, water flow, access, and intended use before recommending a surface system.
How Washington Weather Influences the Decision
Washington’s climate varies by region, but moisture management is important throughout much of the state. Rainwater must be directed away from the home, outdoor structures, and vulnerable edges. In colder areas, freeze-thaw conditions can create additional stress when water enters cracks or poorly drained base materials.
Stamped concrete can perform well when it is correctly designed and installed. The slab should have appropriate thickness, reinforcement, joint placement, slope, and curing protection. Sealing may help reduce moisture penetration and surface wear, although sealers require periodic renewal.
Pavers handle minor ground movement differently because the individual units are not locked into one rigid slab. Small movements may be distributed across joints rather than concentrated into a single visible crack. However, pavers can still shift or settle if the base is poorly prepared or water is allowed to erode supporting materials.
For either option, important climate-related details include:
Positive drainage away from the home
Properly compacted base materials
Water-resistant joint and edge details
Appropriate slope for runoff
Materials rated for the local climate
Maintenance that limits water intrusion
The surface material matters, but water management often has a greater effect on performance than the decorative finish itself.
Design Complexity Can Change the Price Comparison
A simple stamped concrete patio may be noticeably less expensive than a complex paver layout. However, the price difference can shrink as the stamped design becomes more detailed.
Adding multiple integral colors, surface accents, contrasting borders, hand-cut joints, or complex stamp patterns can increase labor. Curved edges and tight access can also make forming and pouring more difficult. If the concrete must be moved by pump or wheelbarrow over a long distance, delivery and labor costs may rise.
Paver pricing also changes with design complexity. Basic concrete pavers arranged in a straightforward pattern are usually more affordable than natural stone units installed in an intricate layout. Curves, small cuts, borders, medallions, and mixed sizes require additional planning and labor.
When comparing quotes, make sure both proposals include comparable design details. A basic stamped slab should not be compared with a premium natural stone paver system as though they were equivalent products. Review the entire scope, including demolition, excavation, base preparation, drainage, reinforcement, edge treatment, sealing, cleanup, and warranties.
Maintenance Requirements for Stamped Concrete
Stamped concrete is relatively easy to clean, but it is not maintenance-free. Dirt, organic debris, algae, moss, deicing products, and standing water can affect the appearance and condition of the surface.
Periodic cleaning helps preserve the finish. Depending on exposure and the sealer used, the surface may also need to be resealed every few years. A sealer can enhance color, reduce staining, and limit moisture penetration, but it must be selected and applied carefully. Some sealers can make wet surfaces slippery, which is an important consideration for pool decks, stairs, and shaded patios.
Common stamped concrete maintenance tasks include:
Sweeping away leaves and debris
Washing the surface with appropriate cleaners
Monitoring control joints and cracks
Resealing as recommended
Avoiding harsh chemicals that can damage the finish
Keeping drainage paths clear
Neglected maintenance can allow the color to fade unevenly or the surface to become stained. Maintenance costs should be included when comparing long-term value.
Maintenance Requirements for Pavers
Pavers also require routine care. Joints may collect weeds, moss, dirt, or organic material, particularly in damp or shaded areas. Joint sand may need to be replenished, and individual units may occasionally require resetting.
Polymeric joint sand can help stabilize joints and reduce weed growth, but it must be installed correctly. Drainage problems should be addressed promptly because flowing water can wash away bedding or joint material. Sealers are optional for many paver systems but may be used to enhance color or improve stain resistance.
Typical paver maintenance may include:
Sweeping and rinsing the surface
Removing weeds or moss from joints
Replacing lost joint material
Resetting settled or uneven units
Replacing damaged pavers
Cleaning stains with material-safe products
Pavers may require more attention at the joints, but localized repairs are generally easier than repairs to a decorative concrete slab.
How Cracking Changes the Cost Equation
Concrete can crack even when it is installed correctly. The goal of proper engineering and workmanship is to manage the risk and control where cracking occurs, not to claim that cracking can be eliminated entirely.
Control joints create intentional weakened lines that encourage the slab to crack in planned locations. Reinforcement helps hold the slab together and control movement, but it does not necessarily prevent all cracks. Soil movement, tree roots, poor drainage, heavy loads, and freeze-thaw exposure can also contribute to cracking.
Pavers do not typically crack across an entire surface in the same way because they are individual pieces. A single paver can still crack, chip, or wear, but replacement is usually straightforward. The flexible nature of the system may make pavers a practical choice on sites where minor settlement is expected.
If a seamless appearance is your main priority, stamped concrete may initially provide the look you prefer. If repairability is more important, pavers may offer greater peace of mind.
Which Option Offers More Design Flexibility?
Both materials provide a wide range of design choices. Stamped concrete can imitate slate, cobblestone, brick, flagstone, wood planks, and other surfaces. It can also be colored to coordinate with siding, masonry, roofing, or landscape features.
Because stamped concrete is poured into forms, it works well for custom curves and large connected surfaces. Borders and accent bands can create visual separation without using separate materials.
Pavers offer extensive options in color, size, texture, pattern, and material. They can be arranged in running bond, basketweave, herringbone, ashlar, or modular layouts. Different paver styles can be combined to create borders, focal points, and transitions between outdoor zones.
Your choice should account for the architecture of the home. A highly decorative surface may look attractive in isolation but feel disconnected from the exterior if the scale, color, and pattern are not coordinated.
Questions to Ask When Comparing Contractor Quotes
A low price is only useful when the scope is complete. Before selecting a contractor, ask what is included in the estimate and how the installation will be built.
Important questions include:
How much excavation is included?
What base materials will be used?
How thick will the base and finished surface be?
How will drainage be handled?
What reinforcement is included for stamped concrete?
Where will control joints be placed?
What edge restraints are included for pavers?
Is sealing included?
How will existing structures and landscaping be protected?
What cleanup and disposal services are included?
What workmanship warranty is provided?
Clear answers make it easier to compare proposals accurately. Two contractors may quote the same square footage while planning very different preparation methods and construction details.
Is Stamped Concrete the Right Choice for Your Project?
Stamped concrete may be the right choice if you want a decorative, continuous surface at a generally lower initial cost than premium pavers. It can be especially practical for large patios, walkways, and outdoor entertaining areas with relatively simple layouts.
Pavers may be the better choice if you value individual unit replacement, flexible design options, and easier access for future repairs. They may also be a strong fit for sites with minor soil movement or projects where long-term repairability is a major concern.
Consider the following priorities before deciding:
Initial project budget
Desired appearance
Local soil and drainage conditions
Maintenance expectations
Repair preferences
Expected foot or vehicle traffic
Accessibility of the work area
Long-term plans for the property
The best material is not simply the one with the lowest price. It is the system that fits the site, supports the intended use, and can be installed correctly within your budget.
Frequently Asked Questions
Is stamped concrete always cheaper than pavers?
No. Stamped concrete is often less expensive upfront, but complex patterns, multiple colors, difficult access, extensive preparation, and premium finishes can increase the cost. Basic pavers may sometimes be competitively priced.
Which material lasts longer?
Both can last for many years when installed on a properly prepared base. Pavers may be easier to maintain over the long term because damaged units can be replaced individually. Stamped concrete can also be durable, but visible repairs may be more difficult to blend.
Does stamped concrete crack?
Stamped concrete can crack because it is still a concrete slab. Proper base preparation, reinforcement, control joints, drainage, and curing can reduce and manage cracking risks.
Do pavers shift over time?
Pavers can shift or settle if the base is poorly compacted, edge restraints fail, or water erodes supporting materials. Correct installation greatly reduces these problems.
Is stamped concrete slippery when wet?
Some stamped surfaces and sealers can become slippery when wet. Texture, sealer selection, traction additives, slope, and drainage should be considered during design.
Which option is easier to repair?
Pavers are usually easier to repair because individual units can be removed and replaced. Stamped concrete repairs may remain visible due to differences in color, texture, and aging.
Does stamped concrete need to be sealed?
Sealing is commonly recommended to help protect color and reduce staining or moisture penetration. The appropriate schedule depends on the product, exposure, and level of use.
Are pavers better for Washington weather?
Pavers can perform well in Washington because the individual units accommodate minor movement and can be repaired separately. However, stamped concrete can also perform well when drainage, base preparation, reinforcement, jointing, and sealing are handled correctly.
Plan Your Outdoor Surface With Evergreen Home Exteriors
The answer to “Is stamped concrete cheaper than pavers?” is usually yes when comparing initial installation costs, but the right choice should be based on the entire life of the project. Drainage, base preparation, repairability, maintenance, design goals, and Washington weather all deserve careful consideration. A well-planned installation protects your investment by addressing the details below the surface as thoroughly as the finish you see every day.
Evergreen Home Exteriors is a Washington home remodeling contractor focused on planning-first project delivery, including clear scope, clean sequencing, and craftsmanship that looks great up close and performs long-term. We take the time to evaluate how materials, site conditions, water management, and construction details work together before the project begins. Schedule your FREE, no-pressure consultation today.
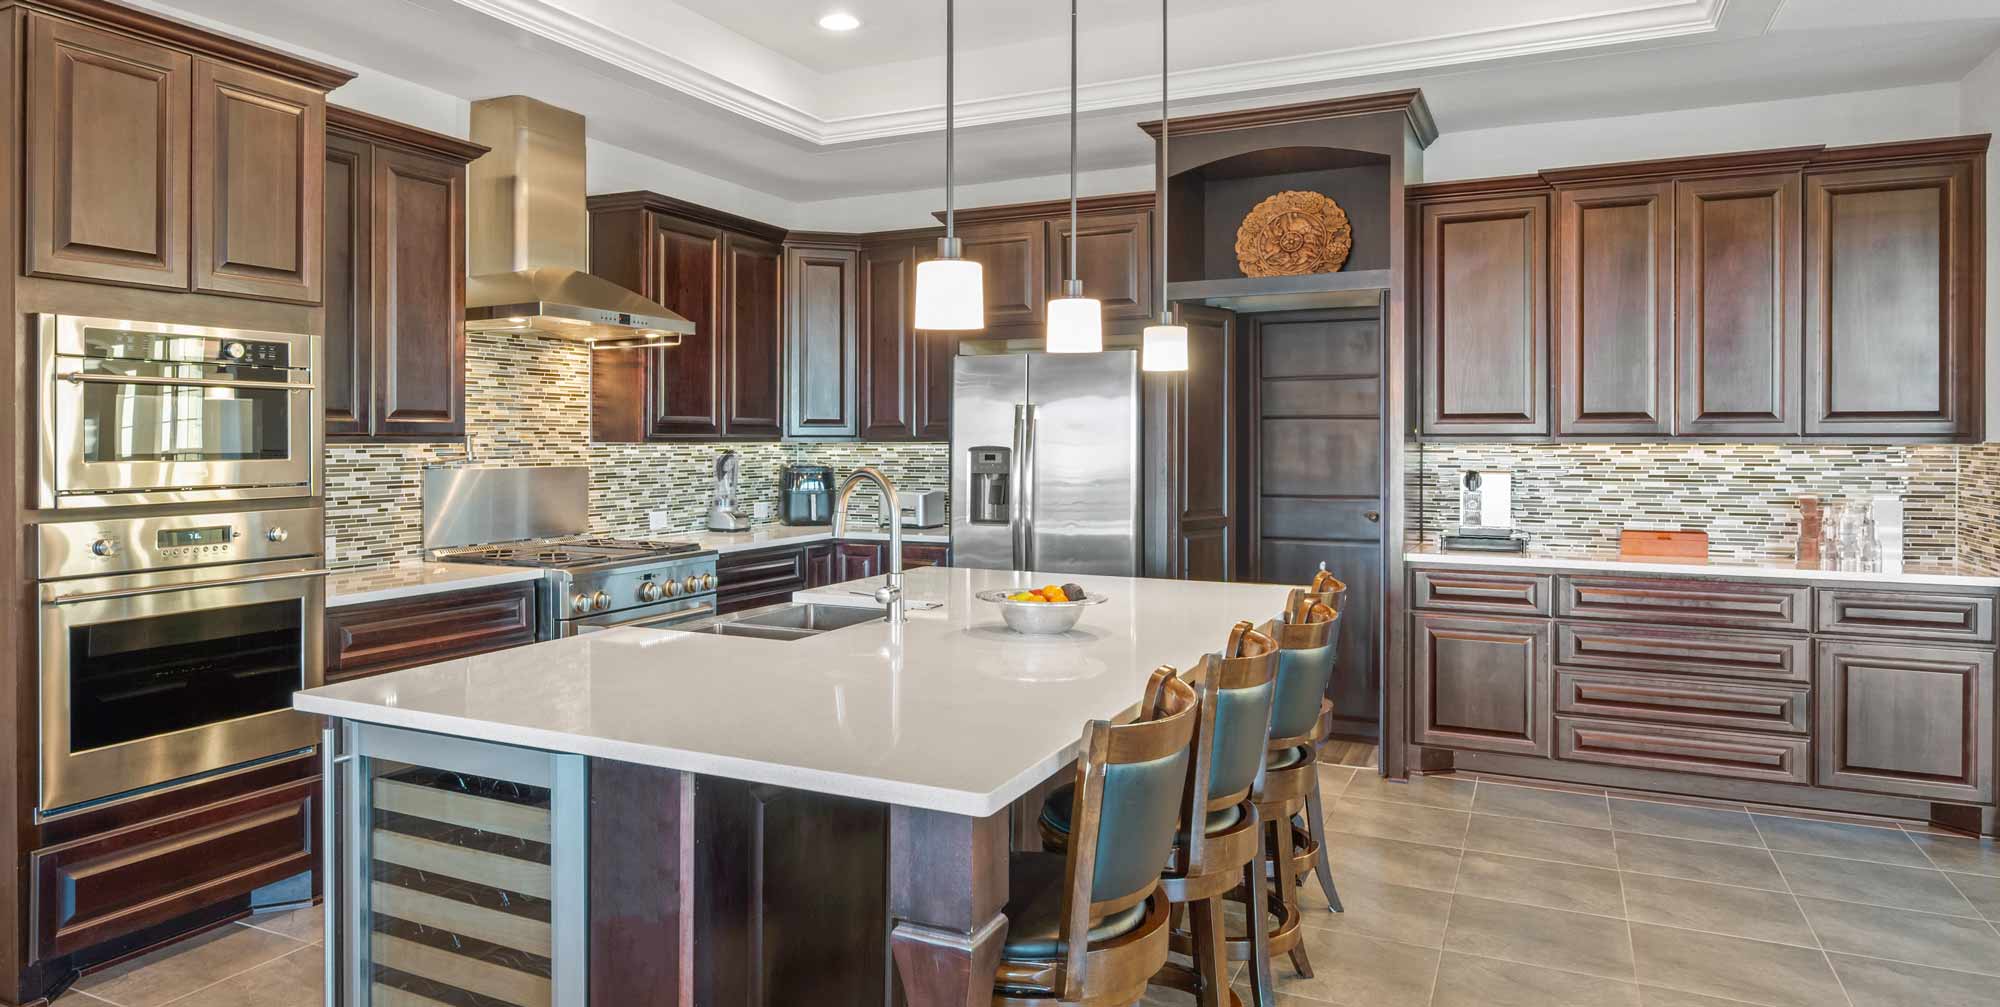
If you are asking, “How much does a kitchen remodel cost?” the most accurate answer is that the price depends on the size of the room, the condition of the existing structure, the materials selected, and the amount of mechanical or layout work involved. A modest update may focus on surfaces and fixtures, while a larger renovation may involve moving walls, replacing plumbing, upgrading electrical circuits, and rebuilding the kitchen from the framing outward. In Washington, homeowners must also account for local labor rates, permitting requirements, and building conditions that can affect the scope of work. A well-planned kitchen remodel is not simply a collection of cabinets and finishes. It is an interconnected system that must support safe movement, efficient cooking, reliable utilities, moisture control, and long-term durability.
Average Kitchen Remodeling Cost Ranges
Kitchen remodeling costs can vary widely, but projects generally fall into three broad categories. These categories are useful for early budgeting, although every kitchen should be evaluated individually before a reliable estimate is prepared.
Minor Kitchen Updates
A minor kitchen update may cost approximately $20,000 to $40,000, depending on the products chosen and the amount of labor required. This type of project often keeps the existing layout and major systems in place.
A minor update may include:
Repainting walls and ceilings
Replacing cabinet hardware
Installing new countertops
Updating the sink and faucet
Replacing lighting fixtures
Installing new flooring
Upgrading appliances
Refinishing or repainting existing cabinets
This approach can make sense when the kitchen functions well but looks dated. The most important cost-saving factor is keeping the plumbing, electrical connections, cabinets, and appliance locations largely unchanged.
Mid-Range Kitchen Remodels
A mid-range kitchen remodel may cost approximately $40,000 to $90,000. These projects commonly include new cabinets, countertops, flooring, appliances, lighting, and plumbing fixtures. Some layout adjustments may also be included, such as moving an island, changing a doorway, or relocating an appliance.
This level of remodeling gives homeowners more control over functionality and appearance. It can address inadequate storage, inefficient work zones, poor lighting, worn materials, and outdated electrical systems. Because more components are being replaced, planning and sequencing become increasingly important.
Major Kitchen Renovations
A major kitchen renovation may range from $90,000 to $175,000 or more. Large kitchens, premium materials, extensive structural work, and major utility relocation can push costs higher.
A major renovation may involve:
Removing or relocating walls
Reconfiguring the entire floor plan
Installing custom or semi-custom cabinets
Relocating plumbing and gas lines
Replacing or upgrading electrical panels
Adding new circuits and outlets
Installing premium countertops
Adding oversized islands
Expanding windows or exterior doors
Repairing framing or subfloor damage
Improving insulation and ventilation
Installing high-end appliances
These projects require careful coordination between designers, engineers, contractors, electricians, plumbers, inspectors, and material suppliers. The more systems that change, the more valuable a detailed plan becomes.
What Determines the Cost of a Kitchen Remodel?
The size of the kitchen matters, but square footage alone does not determine cost. Two kitchens of equal size may have very different budgets depending on their layouts, structural conditions, and material selections.
Cabinetry
Cabinets are often one of the largest expenses in a kitchen remodel. Their cost depends on construction quality, material, door style, finish, hardware, storage features, and installation complexity.
Stock cabinets generally cost less because they are produced in standard sizes. Semi-custom cabinets offer more choices in dimensions, finishes, and configurations. Fully custom cabinets are built specifically for the room and may be necessary when the kitchen has unusual dimensions or highly specific design requirements.
Cabinet installation also requires precision. If walls or floors are not level, the installer must compensate so the cabinets align correctly. Even a small error can affect countertop installation, appliance clearances, drawer operation, and the appearance of the finished kitchen.
Countertops
Countertop pricing varies by material, thickness, edge profile, color, fabrication requirements, and total square footage. Laminate is generally one of the more economical options. Quartz, granite, solid surface, porcelain, butcher block, and natural stone products typically cost more.
The layout also affects fabrication costs. A simple straight countertop is easier to produce than a large island with a sink opening, cooktop cutout, waterfall edges, or complex seams. Supporting the material correctly is equally important, especially around wide spans and overhangs.
Appliances
Appliance packages can range from several thousand dollars to tens of thousands of dollars. The final cost depends on brand, size, features, fuel type, ventilation requirements, and whether appliances are freestanding, slide-in, or built-in.
Changing appliance types may create additional work. For example, switching from an electric range to a gas range may require a new gas line. Installing an induction range may require a dedicated electrical circuit. A larger refrigerator may require cabinet modifications, water line adjustments, or changes to surrounding walls.
Plumbing
Plumbing costs remain relatively manageable when the sink, dishwasher, and refrigerator stay in their existing locations. Costs increase when water and drain lines must be moved.
Relocating a sink across the room may require opening walls or floors, adjusting drain slopes, adding venting, and repairing finishes afterward. Older plumbing may also need to be replaced if it is corroded, undersized, damaged, or incompatible with the new layout.
Electrical Work
Modern kitchens place significant demands on electrical systems. Refrigerators, microwaves, dishwashers, disposals, ranges, ventilation equipment, countertop appliances, and lighting all require reliable power.
A remodel may require:
New dedicated appliance circuits
Ground fault circuit interrupter protection
Arc fault protection where required
Additional countertop outlets
Under-cabinet lighting connections
Pendant and recessed lighting
Dimmer switches
Electrical panel upgrades
Relocation of switches and receptacles
Older homes may not have enough electrical capacity to support current kitchen appliances. Identifying these limitations early helps prevent delays and unexpected changes during construction.
Flooring
Kitchen flooring must tolerate moisture, spills, foot traffic, furniture movement, and frequent cleaning. Common options include luxury vinyl plank, tile, engineered wood, hardwood, and laminate.
Installation costs depend on the flooring material and the condition of the subfloor. A damaged, uneven, or water-affected subfloor may need repair before the new flooring can be installed. Transitions to adjoining rooms must also be considered so the finished floor heights align properly.
Structural Changes
Removing a wall can transform a kitchen, but it may also introduce structural work. A contractor must determine whether the wall is load-bearing and whether it contains electrical wiring, plumbing, ductwork, or gas lines.
If the wall supports the structure above, a properly sized beam and new support points may be required. Depending on the home, engineering calculations or drawings may also be necessary. Structural modifications should never be treated as a simple demolition task.
Why Kitchen Layout Changes Increase Costs
Keeping the existing layout is one of the most effective ways to control a remodeling budget. When appliance, sink, cabinet, and wall locations remain the same, fewer building systems need to be altered.
Layout changes may increase costs by requiring:
Plumbing relocation
Electrical rewiring
New ventilation routes
Gas line changes
Flooring repairs
Framing modifications
Drywall replacement
Permit revisions
Cabinet redesign
Additional inspections
However, a layout change can be worthwhile when the existing kitchen is difficult to use. A well-designed layout can improve traffic flow, food preparation, storage, seating, and access to appliances. The decision should be based on function rather than appearance alone.
Permits and Code Requirements in Washington
Depending on the scope of the remodel, permits may be required for structural work, electrical modifications, plumbing changes, mechanical work, or window and door alterations. Requirements vary by jurisdiction, so the project should be reviewed according to the rules that apply to the property.
Permits add cost and administrative steps, but they also provide important safeguards. Inspections help confirm that work complies with applicable building and safety standards. A contractor who plans for permits from the beginning can incorporate review times and inspection stages into the construction schedule.
Skipping necessary permits can create problems when selling the home, filing insurance claims, or completing future renovations. Proper documentation supports both safety and long-term property value.
Hidden Conditions That Can Affect the Budget
No contractor can see through every wall before construction begins. Older kitchens may conceal conditions that were not visible during the initial evaluation.
Potential hidden issues include:
Water-damaged subfloors
Mold or moisture problems
Outdated wiring
Improper previous repairs
Corroded plumbing
Insufficient insulation
Inadequate ventilation
Framing damage
Pest damage
Uneven floors or walls
Hazardous materials in older homes
A planning-first contractor looks for warning signs before demolition and includes realistic contingency allowances in the budget. While not every hidden condition can be predicted, careful investigation reduces the likelihood of major surprises.
How Much Should You Set Aside for Contingencies?
A contingency is money reserved for unforeseen conditions or owner-requested changes. For many kitchen remodels, setting aside approximately 10 to 20 percent of the project budget is reasonable.
A newer home with clear plans and minimal layout changes may require a smaller contingency. An older home with extensive structural, plumbing, or electrical work may justify a larger reserve.
The contingency should not be viewed as extra money intended for upgrades. It is a risk-management tool. If it is not needed, it remains available to the homeowner at the end of the project.
How Material Selections Affect Kitchen Remodeling Costs
Finish selections can shift the project budget significantly. Cabinets, countertops, appliances, flooring, lighting, plumbing fixtures, tile, and hardware are available at many price points.
Homeowners can manage costs by prioritizing materials according to their effect on performance. Durable cabinet construction, dependable hardware, quality ventilation, moisture-resistant materials, and properly installed countertops often provide more long-term value than decorative features alone.
It helps to divide selections into three groups:
Must-have performance features
Preferred design features
Optional upgrades
This method makes it easier to adjust the budget without compromising the core function of the kitchen.
Why the Lowest Estimate May Not Be the Lowest Cost
A low remodeling estimate may exclude important work or rely on allowances that are too small for the materials the homeowner expects. It may also omit permits, demolition, debris removal, painting, finish carpentry, utility modifications, or final cleanup.
When comparing estimates, homeowners should review more than the total price. Each proposal should explain the scope, materials, responsibilities, allowances, exclusions, payment schedule, and change-order process.
A thorough estimate should clarify:
What will be removed
What will be installed
Which materials are included
Who provides appliances and fixtures
Whether permits are included
How hidden conditions will be handled
What cleanup and disposal are included
What warranty coverage is provided
Clear scope prevents assumptions from becoming costly disputes later.
How Long Does a Kitchen Remodel Take?
A simple kitchen update may take several weeks, while a full renovation may take two to four months or longer. The schedule depends on design completion, permitting, material lead times, inspection availability, and the amount of structural or utility work required.
Cabinet lead times are especially important because they often determine the construction start date. Beginning demolition before critical materials are confirmed can leave the kitchen unusable while the project waits for delayed products.
A well-sequenced project typically follows this general order:
Design and scope development
Material selection
Permitting and approvals
Product ordering
Site protection and demolition
Structural and framing work
Plumbing, electrical, and mechanical rough-ins
Inspections
Insulation and drywall
Cabinet installation
Countertop measurement and fabrication
Flooring and finish work
Appliance and fixture installation
Final inspections and walkthrough
Accurate sequencing reduces downtime and prevents trades from interfering with one another.
Ways to Control Kitchen Remodeling Costs
Cost control begins before construction. Homeowners who make key decisions early are less likely to encounter expensive delays or rushed substitutions.
Helpful strategies include:
Keep plumbing and appliance locations when practical
Establish a realistic budget before selecting finishes
Finalize the design before demolition
Choose materials with reasonable lead times
Limit late changes
Use standard sizes where possible
Invest in durable components
Maintain a contingency fund
Request a clearly defined scope
Work with a contractor who coordinates the entire sequence
Cutting costs indiscriminately can create performance problems. The goal is not always to select the cheapest product. It is to spend where quality, safety, and durability matter most.
Frequently Asked Questions
What is the most expensive part of a kitchen remodel?
Cabinetry is often the largest individual expense, followed by labor, appliances, countertops, and utility work. The largest category varies according to the design and material selections.
Can I remodel a kitchen for $30,000?
A $30,000 budget may support a limited update in a smaller kitchen, especially if the existing layout and cabinets remain. A full renovation with new cabinetry and major utility changes will usually cost more.
Does moving a kitchen sink cost a lot?
Moving a sink can increase costs because water supply lines, drainage, venting, cabinets, countertops, and flooring may need to be modified. The final cost depends on the distance and accessibility of the plumbing.
How much should I budget for kitchen cabinets?
Cabinet costs vary significantly, but they commonly represent 25 to 35 percent of the total remodeling budget. Customization, construction quality, finish, and internal storage features all affect the price.
Do I need a permit for a kitchen remodel?
Permits may be required when the project includes structural, plumbing, electrical, or mechanical changes. Requirements depend on the local jurisdiction and the exact scope of work.
Is a kitchen remodel worth the investment?
A well-designed remodel can improve daily functionality, comfort, storage, safety, and resale appeal. Its value depends on construction quality, design choices, neighborhood conditions, and how long the homeowner plans to use the space.
How can I avoid unexpected remodeling costs?
Begin with a detailed inspection, complete the design early, define the scope clearly, select materials before construction, and maintain a contingency fund. Good planning cannot eliminate every surprise, but it can greatly reduce financial uncertainty.
Should I live in my home during the remodel?
Many homeowners remain in their homes during a kitchen remodel, but they should prepare for noise, dust, limited cooking access, and temporary utility interruptions. A temporary food preparation area can make the process more manageable.
Plan Your Kitchen Remodel With Evergreen Home Exteriors
A reliable kitchen budget begins with more than a rough price per square foot. It requires an accurate scope, careful system evaluation, realistic material selections, and a construction sequence designed to reduce delays and rework. At Evergreen Home Exteriors, we are a Washington remodeling contractor focused on planning-first project delivery. We emphasize clear scope, clean sequencing, and craftsmanship that looks great up close and performs long-term. Schedule your FREE, no-pressure consultation today and start planning a kitchen remodel built around your home, priorities, and budget.
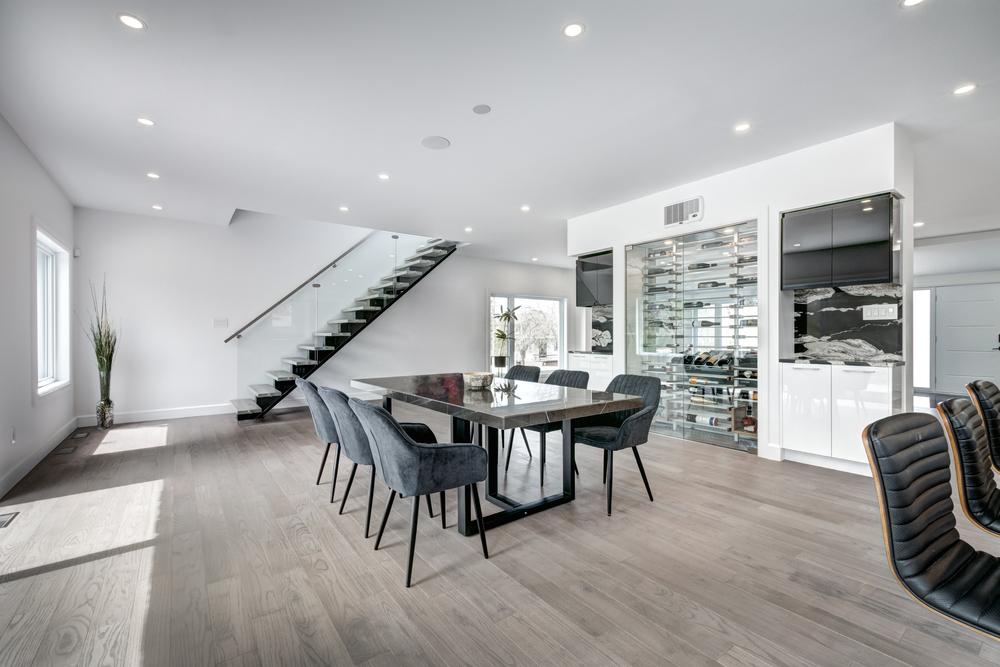
Understanding basement remodel cost starts with recognizing that every basement is a small construction system of its own. The finished space must manage moisture, temperature, ventilation, structure, electrical demand, plumbing access, and everyday comfort. A simple cosmetic update may require a relatively modest investment, while a full transformation with bedrooms, bathrooms, entertainment areas, or structural changes can cost significantly more. The best way to establish a realistic budget is to define the scope early, inspect existing conditions, and build the work in the correct sequence. With a planning-first approach, homeowners can reduce surprises and create a basement that looks polished, functions efficiently, and performs reliably for years.
What Is the Average Cost of a Basement Remodel?
Basement remodeling costs can vary widely based on the size of the space, its current condition, and the level of finish selected. A straightforward remodel of an already dry, partially finished basement may fall on the lower end of the budget range. A full renovation that includes new walls, electrical systems, plumbing, flooring, insulation, and specialized rooms will cost more.
Homeowners commonly encounter broad project ranges such as:
Basic cosmetic refreshes with paint, lighting, and flooring
Midrange remodels with new walls, ceilings, insulation, and electrical work
High-end renovations with bathrooms, wet bars, bedrooms, built-ins, or home theaters
Structural or moisture-related projects that require repairs before finishing begins
Square-foot pricing can be helpful for preliminary planning, but it should not replace a detailed project estimate. Two basements of the same size may have very different costs if one is dry and open while the other needs drainage improvements, structural corrections, or extensive utility relocation.
The Existing Condition of the Basement Matters
Before choosing finishes, a contractor should evaluate the basement as a complete system. Basements are partially or fully below grade, which means they behave differently from upper floors. Moisture moves through concrete, cool surfaces can collect condensation, and small drainage problems can become significant once walls and flooring cover them.
A preconstruction inspection may evaluate:
Signs of water intrusion
Foundation cracks
Drainage and grading conditions
Plumbing locations
Electrical panel capacity
Ceiling height
Existing insulation
Heating and cooling access
Window sizes and emergency egress
Structural posts, beams, and bearing walls
Correcting existing problems before cosmetic work begins is essential. Installing new flooring over a damp slab or closing walls around an active leak may create mold, odors, damaged finishes, and expensive rework. A durable basement remodel starts with solving the technical conditions first.
How Basement Size Affects the Budget
Larger basements generally cost more because they require additional materials and labor. More square footage means more flooring, drywall, insulation, paint, trim, outlets, lighting fixtures, and heating capacity. However, the relationship between size and cost is not always perfectly proportional.
Some expenses remain relatively fixed regardless of square footage. Permits, design services, electrical panel upgrades, plumbing connections, and project mobilization may cost nearly the same in a 700-square-foot basement as they do in a 1,000-square-foot basement. Because of these fixed costs, smaller basements sometimes have a higher cost per square foot.
The layout also influences pricing. One large recreation room is usually less complex than a basement divided into several bedrooms, closets, hallways, bathrooms, and utility spaces. Each additional room requires more framing, drywall, doors, trim, switches, outlets, lighting, and finish work.
Moisture Control and Waterproofing Costs
Moisture management should be considered before framing or flooring begins. Not every basement requires a major waterproofing project, but every basement should be evaluated for moisture risk. The correct solution depends on where the water is coming from and how severe the issue is.
Potential moisture-control work may include:
Sealing minor foundation cracks
Improving exterior grading
Extending downspouts away from the house
Installing or replacing a sump pump
Adding an interior drainage system
Applying appropriate concrete sealers
Improving ventilation or dehumidification
Correcting plumbing leaks
A musty smell, peeling paint, mineral deposits, or darkened concrete may indicate that moisture is present even when standing water is not visible. Addressing these conditions can add to the initial cost, but it protects the entire remodeling investment. Water-resistant materials are helpful, but they are not a substitute for fixing the source of moisture.
Framing, Insulation, and Drywall
Framing defines the basement layout and creates space for insulation, wiring, plumbing, and finished surfaces. The cost depends on the number of rooms, the type of wall system, and whether soffits or chases are needed to conceal ducts, pipes, or beams.
Basement insulation requires careful material selection and installation. Concrete walls tend to remain cooler than interior air, so an improperly assembled wall can trap condensation. The insulation system should reduce heat loss while managing moisture correctly.
Drywall costs are affected by:
Total wall and ceiling area
Number of rooms
Ceiling design
Moisture-resistant material requirements
Access around mechanical equipment
Level of finish
Number of corners, openings, and transitions
A simple open plan is typically more economical than a detailed layout with numerous partitions. However, thoughtful framing can make a basement feel more organized and help separate recreation, storage, mechanical, and living areas.
Electrical and Lighting Costs
Most unfinished basements need substantial electrical work. New living areas require properly placed outlets, switches, smoke alarms, lighting circuits, and connections for entertainment equipment or appliances. The existing electrical panel must also have enough capacity for the added demand.
Electrical costs may include:
New branch circuits
Recessed lighting
Wall outlets
Dimmer switches
Smoke and carbon monoxide alarms
Dedicated circuits for appliances
Bathroom exhaust fans
Data and media wiring
Electrical panel upgrades
Code-required protection devices
Lighting design has a major effect on how the finished basement feels. Because natural light may be limited, relying on a few basic fixtures can make the space seem dark or uneven. Layered lighting often produces a better result. This may include recessed ceiling lights, task lighting, wall lighting, and accent fixtures.
Planning fixture locations before drywall installation reduces the need for later changes. It also helps ensure that switches are placed logically and that lighting supports the furniture layout.
Plumbing and Bathroom Installation
Adding a bathroom is one of the most significant factors affecting basement remodel cost. Plumbing below the main living level can be more complex because drain lines may need to connect beneath the concrete slab. Depending on the existing layout, the project may require concrete cutting, new drain lines, venting, pumps, or utility relocation.
Bathroom costs are influenced by:
Distance from existing plumbing
Drain elevation
Concrete slab work
Toilet and shower locations
Fixture quality
Waterproofing systems
Ventilation
Tile selection
Cabinetry and countertops
Locating the basement bathroom near existing plumbing can help control costs. However, layout decisions should also consider usability, privacy, ceiling clearance, and access to mechanical systems.
Wet bars, laundry rooms, and small kitchenettes also add plumbing and electrical requirements. These features should be identified early so the necessary connections can be coordinated before walls and flooring are completed.
Flooring Options and Cost Considerations
Basement flooring must handle the conditions of a concrete slab. The slab may transmit moisture and remain cooler than floors on upper levels. Material selection should account for comfort, durability, and moisture tolerance.
Common basement flooring options include:
Luxury vinyl plank
Porcelain or ceramic tile
Engineered wood approved for below-grade use
Carpet tiles
Low-pile carpet with an appropriate pad
Polished or coated concrete
Luxury vinyl plank is popular because it offers water resistance, design flexibility, and relatively simple maintenance. Tile is highly durable but may feel cold without an underlayment or radiant heating. Carpet adds softness and acoustic comfort, although it should only be installed when moisture conditions are well controlled.
Floor preparation may add to the cost. Concrete slabs are not always perfectly flat, clean, or crack-free. Grinding, patching, leveling, or moisture mitigation may be necessary before the finished flooring is installed.
Ceiling Options for Basement Remodels
The ceiling design affects appearance, access, sound control, and room height. Drywall ceilings create a clean, finished look, but they reduce access to plumbing, wiring, and ductwork. Suspended ceilings provide easier access but may lower the finished height and create a more traditional basement appearance.
Some homeowners choose painted open ceilings to maximize height and maintain utility access. This approach can work well in recreational or industrial-style spaces, but it still requires detailed preparation. Pipes, ducts, wiring, and framing must be organized, cleaned, and coated carefully.
Ceiling costs may increase when the project requires:
Relocating ductwork
Boxing around beams
Installing sound insulation
Moving plumbing lines
Creating access panels
Adding recessed lighting
Correcting low clearances
A coordinated ceiling plan can make mechanical elements feel intentional rather than awkwardly concealed.
Bedrooms, Egress, and Code Requirements
Creating a legal basement bedroom typically requires more than adding walls and a closet. Building codes often require emergency escape and rescue openings, smoke alarms, minimum ceiling heights, ventilation, and appropriate heating.
An existing basement window may not meet current egress requirements. Installing a larger window can involve cutting the foundation wall, excavating outside the home, adding a window well, improving drainage, and completing interior trim work. These requirements can significantly affect the project budget.
Code compliance is not merely administrative. Egress, ventilation, electrical protection, and fire separation requirements are designed to protect occupants. Addressing them during the planning stage prevents delays and expensive redesigns later.
Material and Finish Selections
Finish selections can move the budget substantially in either direction. Flooring, cabinetry, countertops, tile, plumbing fixtures, lighting, doors, and trim are available across a wide range of price points.
Cost-effective selections do not have to look inexpensive. A well-coordinated set of durable midrange materials often produces a better result than combining a few premium items with weak planning or poor installation.
Areas where homeowners can adjust the budget include:
Flooring material
Cabinet construction
Countertop type
Tile size and pattern
Door style
Trim profile
Plumbing fixtures
Lighting fixtures
Built-in storage
Audio and media equipment
It is helpful to select major materials before construction begins. Late selections can delay scheduling, create substitutions, or require changes to framing, plumbing, and electrical work.
Labor, Permits, and Professional Services
Labor is a major component of basement remodeling costs. A basement renovation may involve carpenters, electricians, plumbers, drywall installers, painters, flooring professionals, HVAC technicians, and tile setters. Coordinating these trades in the correct order is essential.
Permit fees and inspection requirements vary by location and project scope. Work involving structural changes, electrical systems, plumbing, bedrooms, bathrooms, or major mechanical updates typically requires permits. Professional design or engineering services may also be needed for beam changes, foundation openings, or complex structural modifications.
A lower estimate is not always a lower final cost. An incomplete proposal may exclude permits, demolition, disposal, material delivery, floor preparation, painting, or finish carpentry. Homeowners should compare scopes carefully rather than looking only at the total price.
Why Construction Sequencing Matters
A basement remodel involves many interdependent tasks. Plumbing must be installed before concrete is repaired. Electrical wiring must be completed before drywall closes the walls. Insulation must be properly placed before finishes are installed. Flooring may need to wait until painting and heavy construction are complete.
A typical sequence may include:
Site protection and demolition
Moisture or structural repairs
Underground plumbing
Framing
Mechanical, electrical, and plumbing rough-ins
Required inspections
Insulation
Drywall
Painting
Flooring
Cabinetry and trim
Fixtures and finish electrical work
Final inspections
Punch-list completion
Clean sequencing reduces trade conflicts, protects completed work, and helps the project move predictably. It also makes it easier to identify decisions that must be finalized before each construction phase begins.
Ways to Control Basement Remodeling Costs
Cost control begins with scope control. When the project is clearly defined before construction starts, the contractor can build a more accurate estimate and schedule. Frequent layout changes and late material decisions often increase costs because completed work may need to be revised.
Homeowners can manage the budget by:
Keeping plumbing near existing connections
Using an efficient, open layout
Limiting unnecessary utility relocation
Selecting readily available materials
Finalizing fixtures before construction
Separating must-have features from optional upgrades
Maintaining access to mechanical equipment
Including a contingency for hidden conditions
It is also useful to prioritize the work that is difficult to change later. Moisture control, insulation, wiring, plumbing, and framing deserve careful investment. Decorative fixtures and furniture are generally easier to replace in the future.
Hidden Conditions and Contingency Planning
Basements can contain conditions that are not visible until demolition begins. Old wiring, corroded plumbing, hidden moisture, damaged framing, foundation cracks, or undocumented modifications may affect the scope.
A contingency reserve gives the project team a practical way to address these discoveries without disrupting the entire budget. The appropriate reserve depends on the age of the home, the amount of demolition, and the level of uncertainty.
A detailed inspection reduces risk, but it cannot reveal everything behind finished walls or beneath concrete. Transparent communication and clear change-order procedures help homeowners understand how unexpected conditions will be evaluated, priced, and approved.
Frequently Asked Questions
How much should I budget for a basement remodel?
The budget depends on square footage, existing conditions, room layout, finishes, and utility work. A detailed site evaluation is the best way to develop an accurate range.
Is finishing an unfinished basement more expensive than remodeling a finished one?
It can be, because an unfinished basement may need complete framing, insulation, electrical, plumbing, drywall, ceilings, and flooring. However, removing and correcting outdated finished work can also add cost.
What is the most expensive part of a basement remodel?
Bathrooms, structural changes, waterproofing, plumbing relocation, and high-end finish packages are often among the largest cost drivers.
Does a basement remodel require permits?
Many basement projects require permits, especially when adding bedrooms, bathrooms, electrical circuits, plumbing, structural work, or HVAC changes. Requirements vary by jurisdiction.
Can I remodel a basement with a low ceiling?
Possibly. The design may need to minimize soffits, relocate ducts, use low-profile lighting, or leave portions of the ceiling open. Local ceiling-height requirements must also be considered.
Should waterproofing happen before remodeling?
Yes. Active leaks, drainage problems, and significant moisture conditions should be corrected before walls, insulation, flooring, or cabinetry are installed.
Does adding a bathroom increase the basement remodel cost?
Yes. Bathrooms require plumbing, ventilation, electrical work, waterproofing, fixtures, and finish materials. Costs may rise further if concrete cutting or sewage pumping is necessary.
How long does a basement remodel take?
The timeline depends on scope, inspections, material availability, trade coordination, and existing conditions. A basic remodel may move relatively quickly, while a full renovation with bathrooms or structural work will take longer.
Is a basement remodel worth the investment?
A well-designed basement can add practical living space, improve daily functionality, and increase the usefulness of the home. The value is strongest when the work addresses moisture, comfort, code compliance, and long-term durability.
How can I avoid unexpected remodeling costs?
Begin with a thorough inspection, define the scope clearly, make selections early, review exclusions in the estimate, and maintain a contingency fund for concealed conditions.
Plan Your Basement Remodel With Evergreen Home Exteriors
A successful basement remodel is not simply a collection of attractive finishes. It is a coordinated construction project that must manage moisture, structure, utilities, comfort, and code requirements in the right order. Careful planning makes the budget more predictable and helps every layer of the finished space perform as intended.
Evergreen Home Exteriors is a Washington remodeling contractor focused on planning-first project delivery. We emphasize clear scope, clean sequencing, and craftsmanship that looks great up close and performs long-term. Whether you are planning a flexible family room, guest suite, home office, bathroom, or complete lower-level renovation, our team can help you evaluate the space and develop a practical path forward. Schedule your FREE, no-pressure consultation with us today.
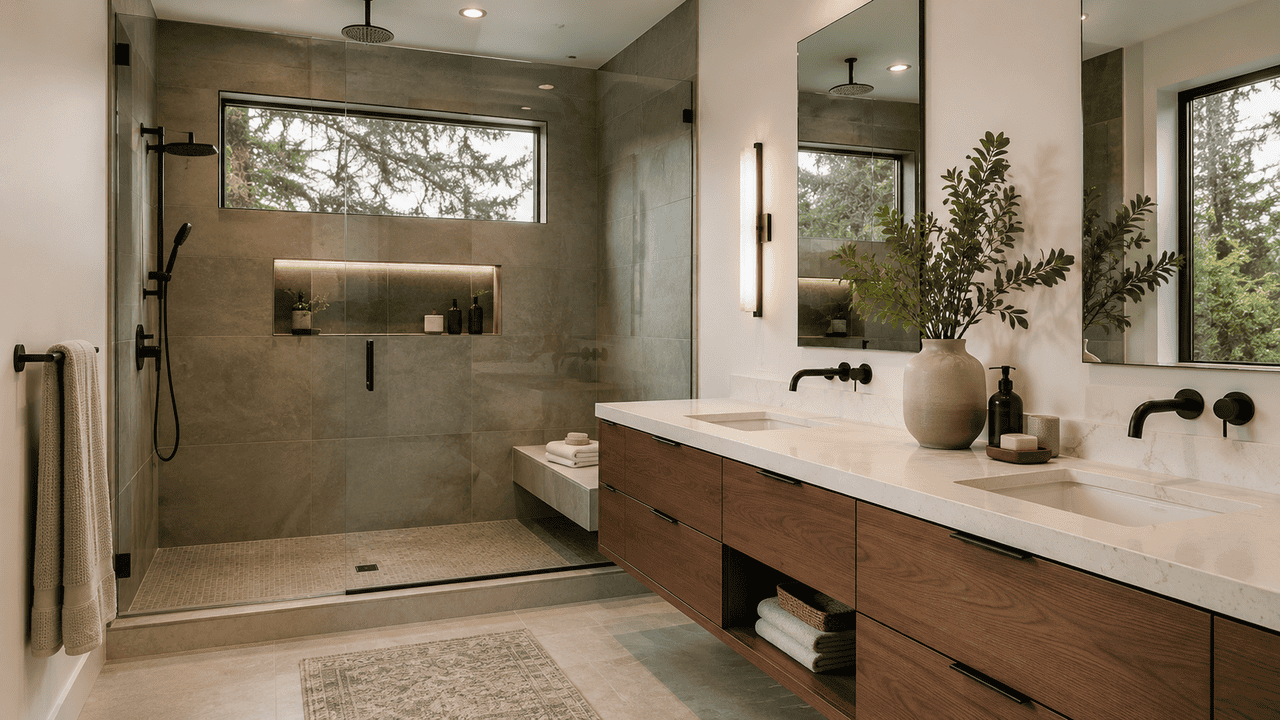
If you are asking, “How much does it cost to remodel a bathroom?” the honest answer is that it depends on scope, layout, materials, existing conditions, and the contractor’s process. A simple surface refresh may cost a few thousand dollars, while a full bathroom remodel with new plumbing, waterproofing, tile, fixtures, lighting, ventilation, and custom finish details can move well into five figures. For many homeowners, the most useful way to think about bathroom remodeling cost is not as one fixed number, but as a system of choices that either keep the project simple or increase complexity.
At Evergreen Home Exteriors, we look at bathroom remodeling through a planning-first lens. That means we care about the sequence of work, the quality of the hidden layers, and how each decision affects performance over time. A bathroom is one of the hardest-working rooms in the house. It has moisture, heat, ventilation demands, plumbing, electrical components, tight clearances, and daily use. When the project is planned well, the finished space looks better, lasts longer, and creates fewer surprises during construction.
Typical Bathroom Remodel Cost Ranges
Bathroom remodel pricing can vary widely, but most projects fall into a few general categories. These ranges are not a substitute for a contractor’s estimate, but they can help you understand what kind of project you may be planning.
A basic bathroom refresh may include items like paint, a new vanity, an updated faucet, a new mirror, improved lighting, and simple fixture swaps. This type of project usually keeps the layout intact and avoids major plumbing, electrical, or tile work.
A mid-range bathroom remodel often includes a new vanity, countertop, sink, faucet, toilet, flooring, lighting, ventilation improvements, tub or shower updates, and new finishes. This is where planning becomes especially important because multiple trades may be involved, and the order of operations matters.
A full bathroom renovation may include demolition down to framing, updated plumbing, electrical upgrades, a new tub or shower system, tile work, waterproofing, ventilation, custom storage, accessibility improvements, and higher-end finish materials. These projects cost more because they involve more labor, more coordination, and more risk management behind the walls.
In broad terms, homeowners may see bathroom remodels range from around $5,000 to $12,000 for smaller or simpler projects, while larger or more involved remodels may range from $15,000 to $30,000 or more. Primary bathrooms, custom tile showers, layout changes, structural repairs, and premium fixtures can push costs higher.
Why Bathroom Remodel Costs Vary So Much
Bathrooms are compact, but they are technically dense. A kitchen may have more square footage, but a bathroom often has more moisture management per square foot than almost any other room in the home. That is why two bathrooms that look similar in photos can have very different budgets.
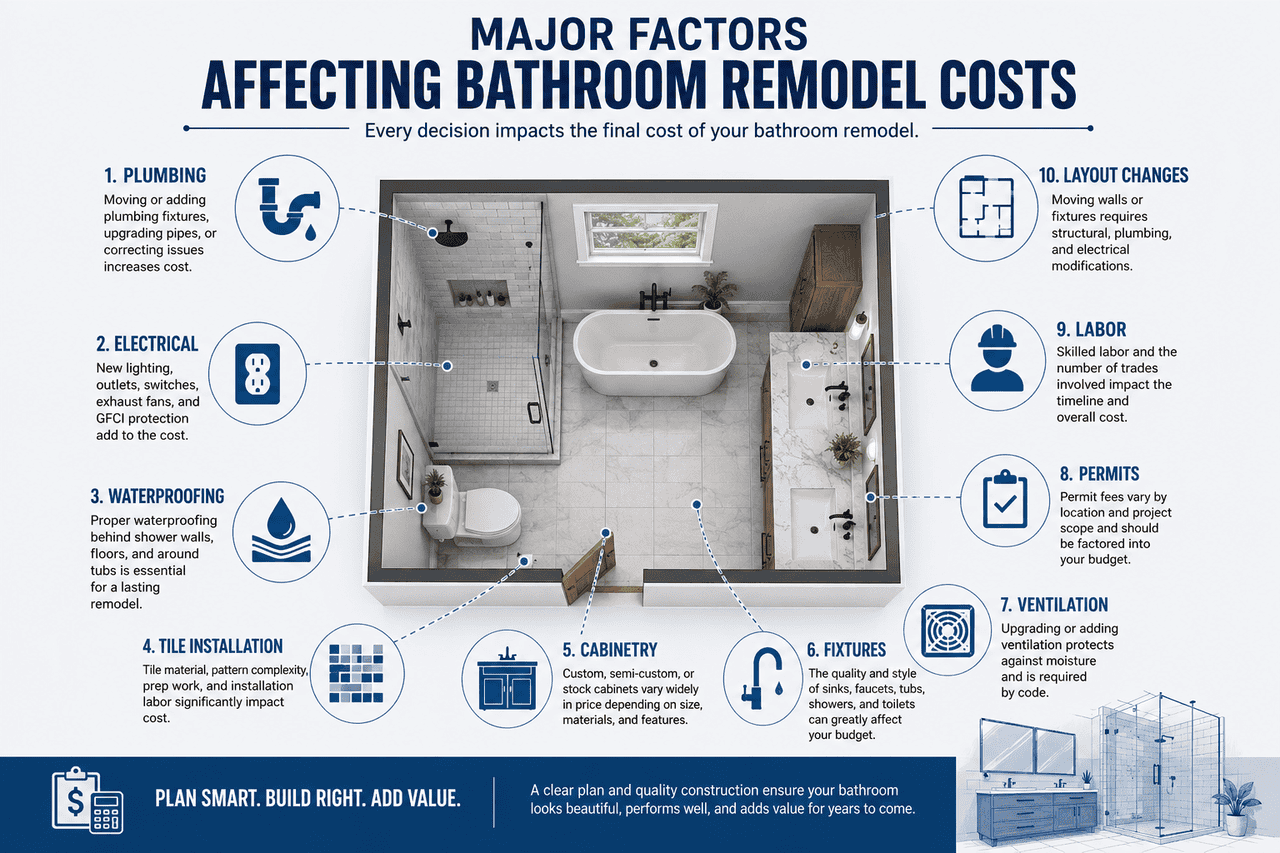
The biggest cost drivers usually include:
Size of the bathroom
Whether the layout changes
Condition of existing plumbing
Condition of subflooring and framing
Tile selection and tile layout
Shower or tub system complexity
Vanity size and countertop material
Lighting and electrical upgrades
Ventilation requirements
Waterproofing details
Permit needs
Labor rates in your local market
Finish level and fixture quality
From an engineer-focused perspective, the hidden conditions matter as much as the visible finish. Water damage, poor ventilation, old plumbing, uneven framing, outdated electrical, or subfloor issues can all affect the final cost. These are not glamorous items, but they are critical to long-term performance.
Planning and rough-in work are critical steps before installing bathroom finishes.
Scope Is the Foundation of Your Budget
The scope of work is the single most important part of your bathroom remodel estimate. Scope defines what is included, what is excluded, what materials are planned, what sequence the work will follow, and what assumptions the contractor is making.
A clear scope helps answer questions like:
Are we replacing the tub, converting it to a shower, or keeping it?
Are plumbing fixtures staying in the same location?
Are walls being opened?
Is tile going on the floor, shower walls, or both?
Is the vanity stock, semi-custom, or custom?
Are we adding storage, outlets, recessed lighting, or heated flooring?
Are there accessibility goals, such as a low-threshold shower?
Will permits be needed?
What happens if water damage is discovered?
Without a defined scope, a low estimate can become expensive later. With a clear scope, homeowners can compare options more accurately and avoid confusion once work begins.
Layout Changes Increase Cost
Keeping plumbing in the same general location is one of the most effective ways to control bathroom remodeling cost. Moving a toilet, shower, tub, or sink can require changes to drain lines, supply lines, venting, framing, flooring, and sometimes the ceiling or walls below.
That does not mean layout changes are a bad idea. Sometimes they are the right solution. A poorly designed bathroom can waste space, create awkward movement, or fail to meet a household’s needs. However, layout changes should be evaluated carefully because they increase cost and complexity.
A planning-first contractor will look at the existing conditions and ask practical questions before recommending a new layout. Is there enough slope for the drain? What is under the floor? Will the framing allow the desired change? Can the ventilation be improved? Will the new design meet code and perform well over time?
Good remodeling is not just about making a drawing look nice. It is about making sure the finished space can be built correctly.
Materials and Finishes Affect the Final Price
Finish materials have a major impact on bathroom remodel cost. A standard vanity and acrylic shower system will usually cost less than custom cabinetry and a tiled shower with niches, benches, and detailed trim. Tile size, pattern, material, and layout also affect labor.
For example, large-format tile may look clean and modern, but it requires careful surface preparation and precise installation. Small mosaic tile may be excellent for shower floors, but it has more grout lines and takes time to install well. Natural stone can be beautiful, but it may require sealing and more maintenance than porcelain.
Common finish decisions include:
Porcelain tile vs. natural stone
Acrylic or fiberglass shower system vs. custom tile shower
Stock vanity vs. custom cabinetry
Laminate countertop vs. quartz or solid surface
Standard fixtures vs. premium fixtures
Basic lighting vs. layered lighting
Standard mirror vs. medicine cabinet or custom mirror
Painted walls vs. tile wainscoting or accent walls
The best material is not always the most expensive one. The best material is the one that fits the design, budget, maintenance expectations, and performance needs of the space.
Labor Is Not Just Installation
Labor is often one of the largest portions of a bathroom remodel budget, and for good reason. Bathroom remodeling requires coordination between demolition, framing, plumbing, electrical, waterproofing, drywall, tile, painting, fixture installation, finish carpentry, and cleanup.
Skilled labor also reduces risk. A shower that looks beautiful on day one still needs to manage water correctly after years of use. A vanity installation should be level, secure, and properly connected. A fan should move moisture out of the room effectively. Tile should be aligned, bonded correctly, and finished with clean transitions.
When homeowners compare estimates, it is important to look beyond the total price. A lower number may not include the same preparation, waterproofing, sequencing, cleanup, or craftsmanship. In remodeling, shortcuts can look affordable at first and become costly later.
Several construction and design decisions influence the final cost of a bathroom remodel.
The Hidden Costs Homeowners Should Plan For
Bathrooms often reveal hidden issues once demolition begins. This is especially true in older homes or bathrooms that have had leaks, poor ventilation, or previous DIY work. A good contractor cannot see everything before opening walls and floors, but a good process can reduce uncertainty.
Potential hidden costs include:
Water-damaged subflooring
Mold or mildew remediation
Rot near tubs, showers, or toilets
Outdated plumbing lines
Improper previous repairs
Electrical that needs to be brought up to current standards
Insufficient ventilation
Uneven walls or floors
Structural concerns
Permit-related changes
A smart budget includes a contingency. Many homeowners set aside 10 to 20 percent for unknowns, especially on larger remodels. That does not mean the project will automatically use that money. It simply gives the plan room to absorb real conditions without panic.
What a Planning-First Bathroom Remodel Looks Like
A planning-first remodel begins before demolition. The goal is to reduce ambiguity, clarify expectations, and create a buildable sequence. This is where Evergreen Home Exteriors’ approach is especially valuable.
A strong planning process should include:
A detailed consultation
Discussion of goals, frustrations, and must-haves
Evaluation of the existing bathroom
Clear scope development
Material and fixture planning
Sequencing of trades
Budget alignment
Timeline expectations
Communication about risks and unknowns
Craftsmanship standards for visible and hidden work
Clean sequencing matters because bathrooms involve many steps in a tight space. The order of work affects quality. Demolition must happen before rough plumbing and electrical. Rough-ins need to be complete before walls are closed. Waterproofing must happen before tile. Tile must cure before certain fixtures are installed. Finish details come last, and they should not be rushed.
When the sequence is clean, the project is easier to manage, and the finished result is more dependable.
How to Control Bathroom Remodel Costs Without Cutting Corners
Cost control does not mean choosing the cheapest option for everything. It means making deliberate decisions. The goal is to spend where it matters and simplify where it makes sense.
Here are practical ways to manage your budget:
Keep the existing plumbing layout when possible.
Choose durable, proven materials.
Avoid overly complex tile patterns if labor cost is a concern.
Select fixtures early to prevent delays.
Decide on must-haves before construction begins.
Use a clear scope to avoid misunderstandings.
Plan for ventilation and waterproofing instead of treating them as afterthoughts.
Choose quality installation over trendy details that may not age well.
Build in a contingency for hidden conditions.
Work with a contractor who explains the sequence and not just the price.
The best remodels are balanced. They look good, function well, and hold up under daily use.
Is a Bathroom Remodel Worth It?
For many homeowners, a bathroom remodel is worth it because it improves comfort, safety, efficiency, and home value. A well-designed bathroom can make mornings smoother, reduce maintenance issues, improve storage, and make the home feel more modern.
The return is not only financial. A bathroom that drains properly, ventilates well, resists moisture, and feels good to use every day adds real quality of life. If you plan to stay in your home, that daily value matters. If you plan to sell, an updated bathroom can also help buyers feel more confident about the condition of the home.
The key is to remodel with a long-term mindset. Pretty finishes are important, but they should be supported by sound construction.
How to Compare Bathroom Remodeling Estimates
When you receive estimates, do not compare only the bottom-line number. Compare what each contractor is actually including.
Ask questions like:
Is demolition included?
Are permits included if needed?
Is plumbing included?
Is electrical included?
What waterproofing system will be used?
Are materials included or allowances listed?
What happens if hidden damage is found?
Is cleanup included?
Who manages the schedule?
What workmanship standards are expected?
How are changes documented?
A detailed estimate gives you a better basis for decision-making. It also reflects the contractor’s planning discipline. If the scope is vague before work begins, it is likely to feel even more vague during construction.
FAQ
How much does it cost to remodel a small bathroom?
A small bathroom remodel can cost less than a larger bathroom, but the price still depends on the scope. A simple refresh may stay in the lower thousands, while a full small bathroom renovation with tile, plumbing, electrical, and waterproofing can cost significantly more.
What is the most expensive part of a bathroom remodel?
Labor, tile work, plumbing changes, and custom showers are often among the most expensive parts. Hidden repairs, such as water-damaged subflooring or outdated plumbing, can also add cost.
Can I remodel a bathroom without changing the layout?
Yes. Keeping the layout is often one of the best ways to control cost. You can still make a major improvement with new fixtures, flooring, lighting, vanity, shower or tub updates, and better finishes.
How long does a bathroom remodel take?
Timeline depends on the scope, material availability, inspections, and site conditions. A simple update may take much less time than a full remodel that includes demolition, rough-ins, waterproofing, tile, and custom finish work.
Do I need a permit for a bathroom remodel?
It depends on the work being performed and your local requirements. Plumbing, electrical, structural, or major layout changes may require permits. A qualified contractor can help determine what applies to your project.
Is a tiled shower worth the extra cost?
A tiled shower can be worth it if you want a custom look, specific layout, niche, bench, or premium finish. The key is proper waterproofing and installation. A tiled shower should be built for long-term moisture performance, not just appearance.
How can I avoid surprise costs?
Start with a clear scope, select materials early, ask about hidden conditions, and include a contingency in your budget. Working with a planning-first contractor also helps reduce avoidable surprises.
Should I choose the lowest bathroom remodel estimate?
Not automatically. A low estimate may leave out important items like waterproofing, permits, prep work, cleanup, or finish details. Compare scope, process, communication, and craftsmanship along with price.
Plan Your Bathroom Remodel With Evergreen Home Exteriors
A bathroom remodel is more than a cosmetic upgrade. It is a technical project that needs a clear scope, clean sequencing, and craftsmanship that looks great up close and performs long-term. We are a Washington remodeling contractor focused on planning-first project delivery, from the first conversation to the final walkthrough.
If you are ready to understand your options, align your budget, and build a bathroom that works beautifully for your home, we are here to help. Schedule your FREE, no-pressure consultation today.