

Roof Replacement Checklist: What to Expect Before, During, and After
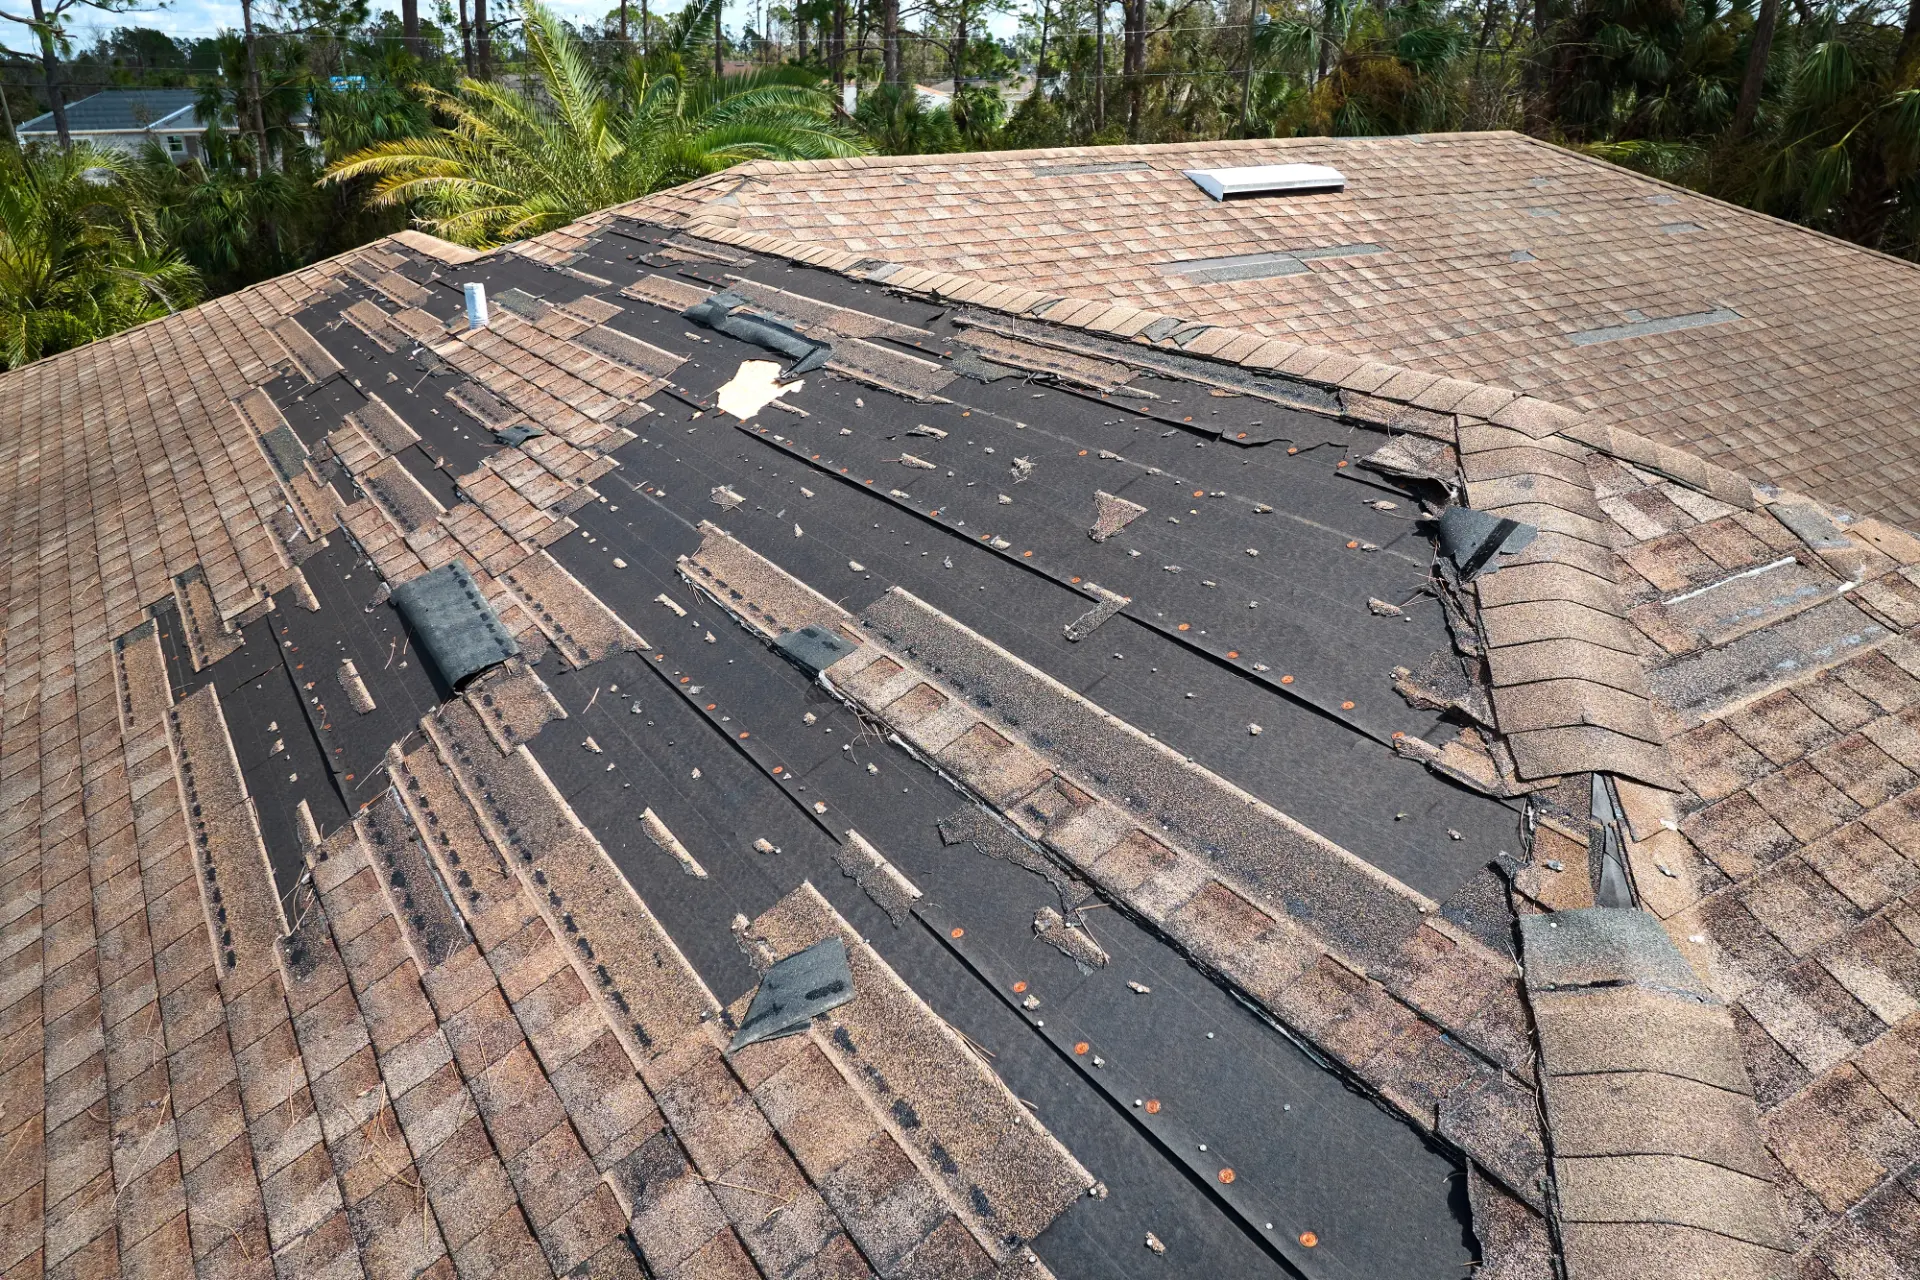
A roof replacement ranks among the most disruptive and expensive projects a homeowner will ever authorize, and most of the anxiety around it comes from not knowing what happens next. The noise, the debris, and the possibility of a crew discovering rotted sheathing and presenting a change order mid-project are legitimate concerns. This checklist organizes the process into three clear phases: before, during, and after construction. Preparation reduces costly surprises. Knowing these steps helps you walk into the project with a clear picture of what to expect at each stage.
A roof does more than keep rain out. It regulates thermal performance, manages moisture vapor moving through the building envelope, and protects the structural framing beneath it. According to NRCA roofing guidelines, most standard residential roof systems carry a designed service life of approximately 20 years, though that figure shifts considerably based on climate, installation quality, and how consistently the roof gets maintained. Understanding that context helps you make smarter decisions at every stage of the process.
Evaluating Your Roof and Planning the Project
Before any contractor sets foot on your property, you need a clear-eyed answer to one question: does this roof need full replacement, or is something less invasive still viable?
The actual lifespan of any given roof depends heavily on local climate conditions, the quality of the original installation, and whether the homeowner has kept up with maintenance over the years (per the NRCA roofing guidelines). In wet, high-moisture climates like Western Washington, roofs tend to age faster than the national average because persistent moisture accelerates granule loss, promotes moss and algae growth, and stresses flashings. Knowing the signs you need a new roof, such as missing or curling shingles, heavy granule accumulation in gutters, active water infiltration, or sagging sections, gives you a concrete starting point for that conversation with a contractor.
Once you’ve confirmed replacement is necessary, you face a structural and legal decision: complete tear-off or re-cover. Re-covering means installing new shingles directly over the existing layer, which saves labor and disposal costs in the short term. Building codes typically restrict residential properties to a maximum of one re-cover layer before a complete replacement becomes legally mandatory (per the NRCA roofing guidelines). That limit exists for good reason. A re-cover conceals the wooden deck beneath, making it impossible to identify rotted or delaminated sheathing that could compromise the entire assembly. A complete tear-off costs more upfront, but it gives the crew a clear view of the deck’s condition before new materials go down. This transparency often prevents far more expensive surprises later. Tear-offs protect long-term value.
Before Construction: The Pre-Installation Checklist
The preparation completed before a crew arrives determines how smoothly the project runs. This phase covers contractor vetting, contract review, and property preparation.
On the contractor side, the NRCA roofing guidelines recommend obtaining three or four detailed proposals from reputable contractors before committing. Price alone is a poor filter; the proposals should allow you to compare materials, scope of work, and workmanship standards side by side. Compare every detail carefully. A thorough guide to choosing a roofing contractor will walk you through the vetting criteria in detail, but at minimum, every proposal you receive should contain the following:
- Scope and materials: The roof covering type, manufacturer, color, and all associated accessories, along with flashing and ventilation specifications.
- Installation methods and timeline: How the work will be performed, approximate start and completion dates, and payment terms.
- Warranty coverage: The manufacturer’s material defect warranty (which ranges from 20 years to a lifetime depending on the product) and the contractor’s workmanship warranty. Workmanship coverage typically runs one to two years, though there is no industry-standard duration; this varies entirely by contractor (per the NRCA roofing guidelines).
- Damage responsibility: Explicit contract language defining who covers the cost of repairing any exterior landscaping or interior finishes damaged during construction (per the NRCA roofing guidelines).
- Code compliance: Confirmation that the project meets local building and energy conservation codes, which dictate minimum thermal insulation requirements and restrict the number of allowable roof layers (per NRCA codes and standards).
On the property side, prepare both the interior and exterior before construction begins. Inside, secure fragile wall art and clear items from the attic: the vibrations from tear-off travel through the structure and will knock down dust and dislodge anything loosely stored. Outside, clear the driveway, move vehicles well away from the house, and protect sensitive landscaping or patio furniture from falling debris.
Schedule Your Free Professional Roof Consultation Today
Ready to protect your home with a roof engineered specifically for the Pacific Northwest climate? Contact the practical experts at Evergreen Home Exteriors today at (253) 320-5383 to schedule your free, thorough roof inspection and detailed project consultation. Let our team guide you through a stress-free replacement process designed to deliver lasting peace of mind.
During Construction: What to Expect on Installation Day
Understanding the construction sequence removes most of the anxiety from installation day. Each phase has a defined purpose, and knowing what you’re looking at and listening for helps you monitor quality without getting in the crew’s way.
Heavy materials, including shingles, underlayment rolls, and accessories, typically arrive at the driveway or are staged directly on the roof a day or two before construction begins. The project itself opens with tear-off, which is the loudest and most chaotic phase. Expect heavy noise. Expect significant noise and a steady accumulation of debris around the perimeter of the house. Once the old materials come off, the crew exposes the deck, and this is where the hidden-cost conversation sometimes happens. If the sheathing shows rot or delamination, that wood must be replaced to give fasteners a solid substrate. Reputable contractors document this damage with photographs and walk you through any change orders before proceeding. If a crew skips that conversation and just bills you afterward, that is a red flag worth taking seriously.
With the deck confirmed solid, underlayment goes down before any shingles. The correct specification depends on roof slope. A single layer of No. 15 asphalt-saturated underlayment works for slopes of 18 degrees or greater; slopes between 14 and 18 degrees require a double layer with a 19-inch overlap (per the NRCA roofing guidelines). For heavier-weight shingles, No. 30 underlayment is the appropriate choice (per the NRCA roofing guidelines). There is currently limited quantitative data comparing the performance of No. 15 versus No. 30 beyond these slope and weight guidelines, so the specifications above represent the practical standard rather than a mathematically derived threshold.
A few additional installation standards are worth monitoring throughout the project:
- Fasteners: Installers should use galvanized steel or equivalent corrosion-resistant roofing nails, not staples. Staples do not meet professional recommendations or most local building codes (per the NRCA roofing guidelines).
- Rain after underlayment: Minor wrinkling in the underlayment following rain is acceptable and does not require replacement, provided it does not interfere with shingle placement (per the NRCA roofing guidelines).
- Cold-weather precautions: Shingles stored in cold conditions become brittle and prone to cracking during handling. In cold weather, shingles should be kept in a warm area and loaded onto the roof in small batches. In high-wind areas, shingles installed before temperatures warm sufficiently for self-sealing strips to activate should be hand-tabbed with quarter-sized dabs of adhesive (per the NRCA roofing guidelines). Note that industry literature does not define a specific temperature threshold for brittleness; contractors use judgment based on conditions.
- Slope minimums: Some manufacturers permit asphalt shingle installation on slopes as low as 11 degrees, but the NRCA advises against any installation below 18 degrees, since shingle systems depend on adequate slope to shed water through gravity rather than relying on a watertight seal (per the NRCA roofing guidelines).
“The new siding installed by Evergreen didn’t just improve the look of our home; it insulated better and reduced our energy bills. When we sold our property, buyers were immediately drawn to the modern curb appeal and quality construction.” – Jason R. from Tacoma
After Construction: Post-Installation and Long-Term Care
Once shingles are installed and the ridge cap is set, the crew’s job is not finished. Cleanup is a defined part of the scope, and you should expect a thorough pass with magnetic sweeps across the lawn, driveway, and any landscaped areas adjacent to the house. Loose roofing nails are a genuine hazard to bare feet, pets, and tires, and a contractor who skips the magnetic sweep is cutting a corner that costs you later.
Before the crew leaves, walk the entire property with the project manager. Check that all debris has been removed, that downspouts are clear, and that no flashing seams appear lifted or improperly sealed. Details matter during walkthroughs. Ask to see documentation of any deck repairs made during the project. This walkthrough is your opportunity to raise concerns while the crew is still on site and the work is fresh. Our guide to the roof replacement process details what contractors include in a professional scope of work.
Secure Your Home’s Future with Evergreen Home Exteriors
A roof replacement is more than just new shingles: it is an engineered system designed to keep your family safe and dry. At Evergreen Home Exteriors, we bring Pacific Northwest practical expertise to every project, ensuring your home is prepared to withstand our region’s relentless moisture. Contact Jon or Anne Marie today at (253) 320-5383 to discuss your roofing needs. Let us deliver a smooth, professional experience from start to finish.
Post-Installation Inspection and Maintenance Checklist
Proper installation and consistent maintenance are the two factors that most directly determine how long a roof performs and how cost-effective it proves over time (per the NRCA roofing guidelines). The checklist below covers what to verify immediately after installation and what to monitor on an ongoing basis.
Attic ventilation balance is the first thing to confirm. A correctly balanced system places approximately 50% of the total ventilation area at the eaves or soffits and 50% at or near the ridge (per the NRCA roofing guidelines). In cold climates with persistent snow, which applies directly to elevated areas across Western Washington, balanced ventilation removes excess moisture from the attic, prevents condensation from degrading the sheathing, and stops ice dams from forming at the eaves. One common misconception worth correcting: research has not confirmed a significant effect of attic ventilation on average roof surface temperatures during summer. Summer roof temperatures respond primarily to roof orientation and material color, not ventilation rate (per the NRCA roofing guidelines). Ventilation matters most in winter.
Biannual inspections, one in spring and one in fall, give you a structured opportunity to catch developing problems before they become expensive ones. Each inspection should cover cracked, warped, or missing shingles; loose seams; deteriorated flashings around chimneys, skylights, and pipe penetrations; and granule accumulation in gutters, which signals accelerating shingle wear (per the NRCA roofing guidelines).
For homeowner-performed maintenance, keep the scope limited to visual inspections and gutter cleaning from a firmly secured ladder with rubber safety feet. Physical repairs belong to trained professionals (per the NRCA roofing guidelines). Never attempt DIY roof repairs. Staying within those limits also protects your warranties: both the manufacturer’s material warranty and the contractor’s workmanship coverage can be voided by unauthorized repairs or modifications.
Frequently Asked Questions About Roof Replacements
How do you know when to replace your roof?
The clearest indicators are visible and structural: missing, curling, or buckling shingles; heavy granule accumulation in gutters; active water leaks or staining on interior ceilings; and sagging sections that suggest compromised decking or framing. Age matters independently of visible damage: a standard asphalt shingle roof approaching or past its 20-year service life has likely degraded enough that even a clean-looking surface conceals significant wear. A professional inspection at that age is worth scheduling regardless of whether you’ve noticed symptoms.
How many bundles of shingles do I need for a 2,000 sq ft roof?
Roofing materials are sold and measured in squares, where one square equals 100 square feet of roof surface. A 2,000-square-foot roof equals 20 squares. Standard asphalt shingles require approximately three bundles per square, putting the base quantity at around 60 bundles. Add 10% to 15% on top of that for waste, starter strips, and ridge caps, which brings the practical order to roughly 66 to 69 bundles. Your contractor will calculate the precise figure based on the actual measured roof area, pitch, and hip and valley complexity.
What is the best roof cleaning method?
A low-pressure wash combined with a specialized cleaning solution, typically water with a mild bleach concentration or an eco-friendly surfactant, kills moss, algae, and lichen at the root without stripping the protective granule layer from the shingles. High-pressure power washing is the method to avoid: it dislodges granules, accelerates shingle aging, and frequently voids manufacturer warranties. If moss or algae growth is recurring, zinc or copper strip treatments installed near the ridge can slow regrowth between cleanings.
What is the 25% rule for roofing?
Many local building codes include a provision stating that if more than 25% of a roof is repaired, replaced, or otherwise altered within a 12-month period, the entire roof must be brought into compliance with the current local building code. The intent is to prevent incremental patchwork from perpetuating a structurally deficient or code-noncompliant roof assembly. Partial repairs rarely solve structural issues. In practice, this rule often triggers a full replacement requirement when a homeowner has been deferring maintenance across multiple sections of the roof.
Is a 20-year-old roof considered old?
For standard asphalt shingle roofs, yes: 20 years marks the end of the designed service life. Even without active leaks, a roof at this age has likely experienced enough granule loss, thermal cycling, and UV degradation that its resistance to wind uplift and slow moisture infiltration is significantly reduced. A professional inspection at the 20-year mark is the responsible move, and in most cases, the inspector will find enough wear to recommend replacement rather than continued repair.
Call Us Today
Replacing a roof is a significant investment in your home’s structural integrity, energy performance, and long-term value. The homeowners who navigate it most successfully are the ones who treat the process as a managed project rather than a reactive emergency by getting multiple proposals, reviewing contracts carefully, monitoring installation standards, and establishing a maintenance routine once the work is complete. The checklists in this guide give you a concrete framework for each phase, so you can engage with your contractor from an informed position and catch problems early if they arise.
Ready to take the next step in protecting your home? Contact the dedicated team at Evergreen Home Exteriors today to schedule your professional consultation. We proudly serve homeowners across Western Washington, including King, Pierce, Snohomish, Kitsap, and Whatcom counties. Explore our detailed roof replacement and repair services online to request your free estimate. Let us help you build a roof that stands up to the Pacific Northwest weather for decades to come.